🎬 Approval
Submitting requests for approval is a key step in many workflows. With Workiom’s Approval Action, you can automate this process to ensure decisions are made quickly and consistently—without chasing down responses manually.
How Approval Works
- The requester is notified that their request has been sent.
- The approver(s) receive a notification to approve or reject the request.
- The requester is notified once a decision is made.
How to Set Up an Approval Action
To create an automated approval process:
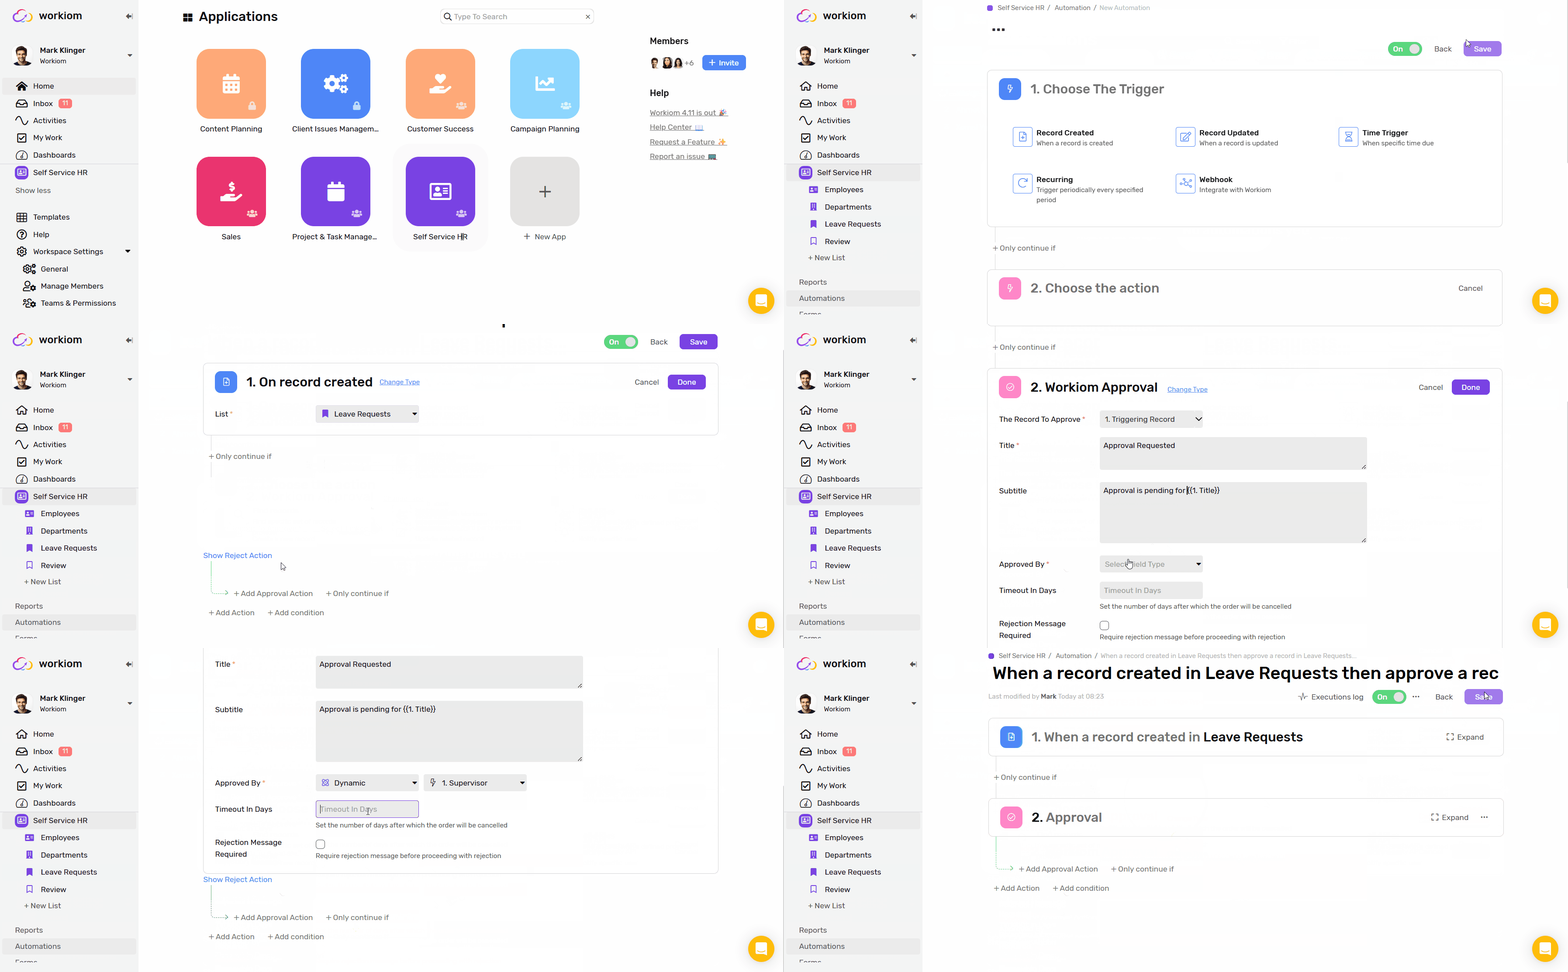
- Create a new automation.
- Choose a trigger, such as Record Created.
- Add an Action → select Approval.
- Choose the record to be approved (typically, the triggering record).
- Customize the Title and Subtitle – these will appear in the notification sent to approvers.
- Select who can approve the request.
- (Optional) Set an expiration period – the request will expire if not approved within this timeframe.
- (Optional) Check "Rejection Message Required" to make it mandatory for approvers to provide a reason if they reject the request.
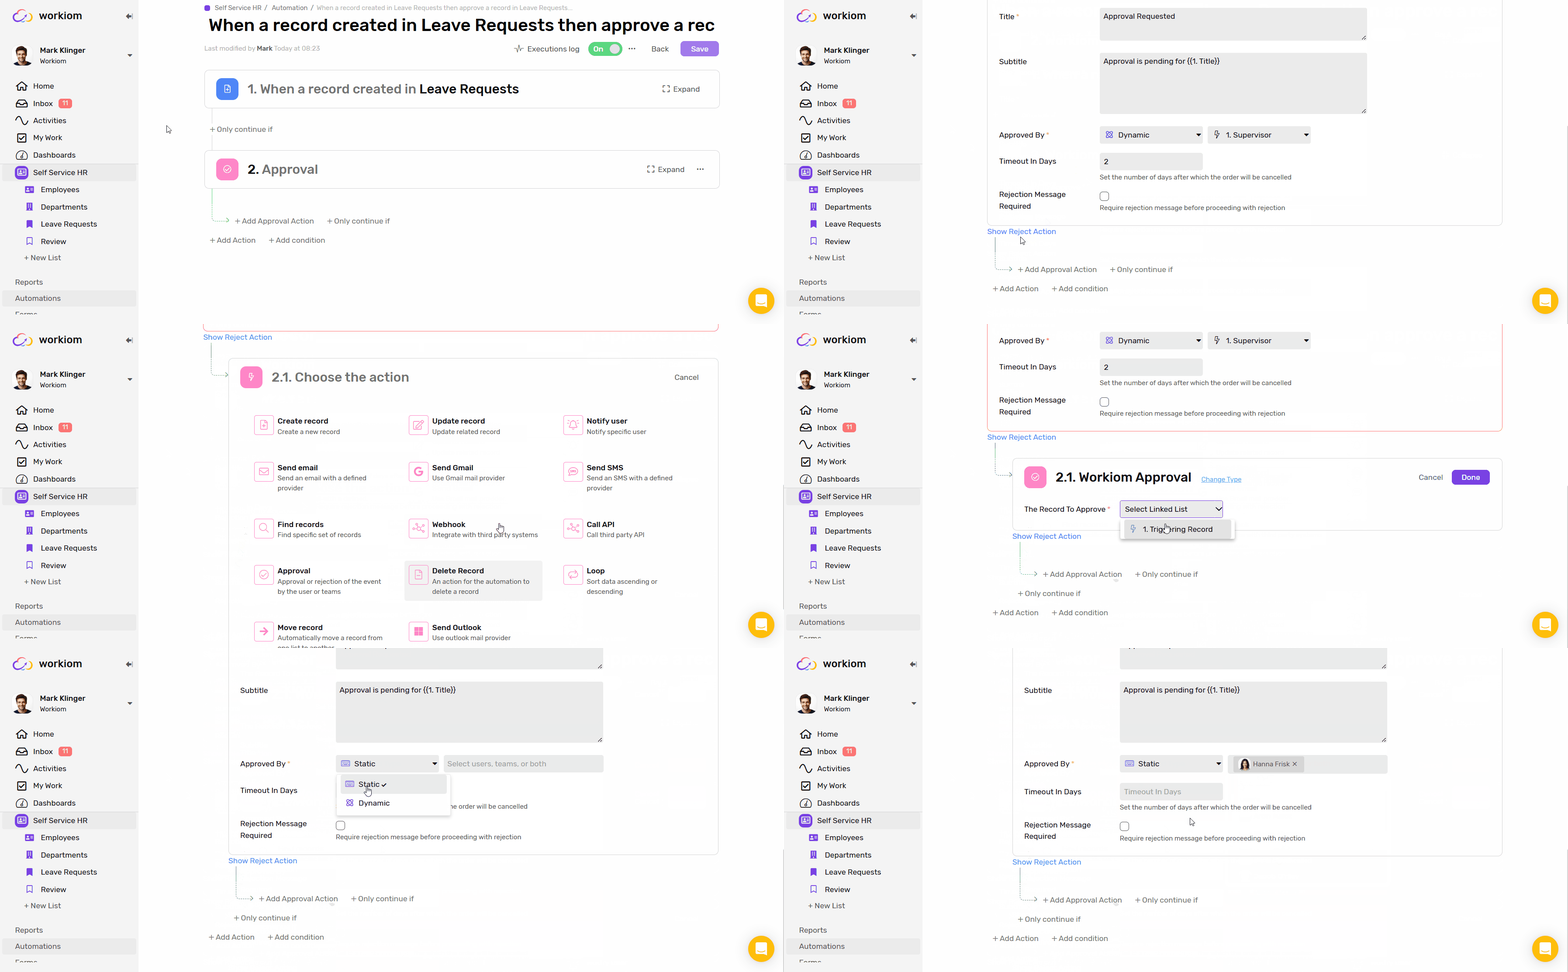
- Add follow-up actions:
- Under On Approval, set what should happen if the request is approved.
- Under On Rejection, set what should happen if the request is denied.
📸 Example Setup GIF:

💡 Tip:
You can add another Approval action under the On Approval section to build a multi-layer approval flow.
📸 Multi-layer Approval Example:
