Static List

Type of payment, Ticket Priority, Leave Type, Expense Category, Client Preferred Language, If you have a list of values that repeats for all your records, then a static list will make it easy to group those records according to those values.

Chat icon
Transcript

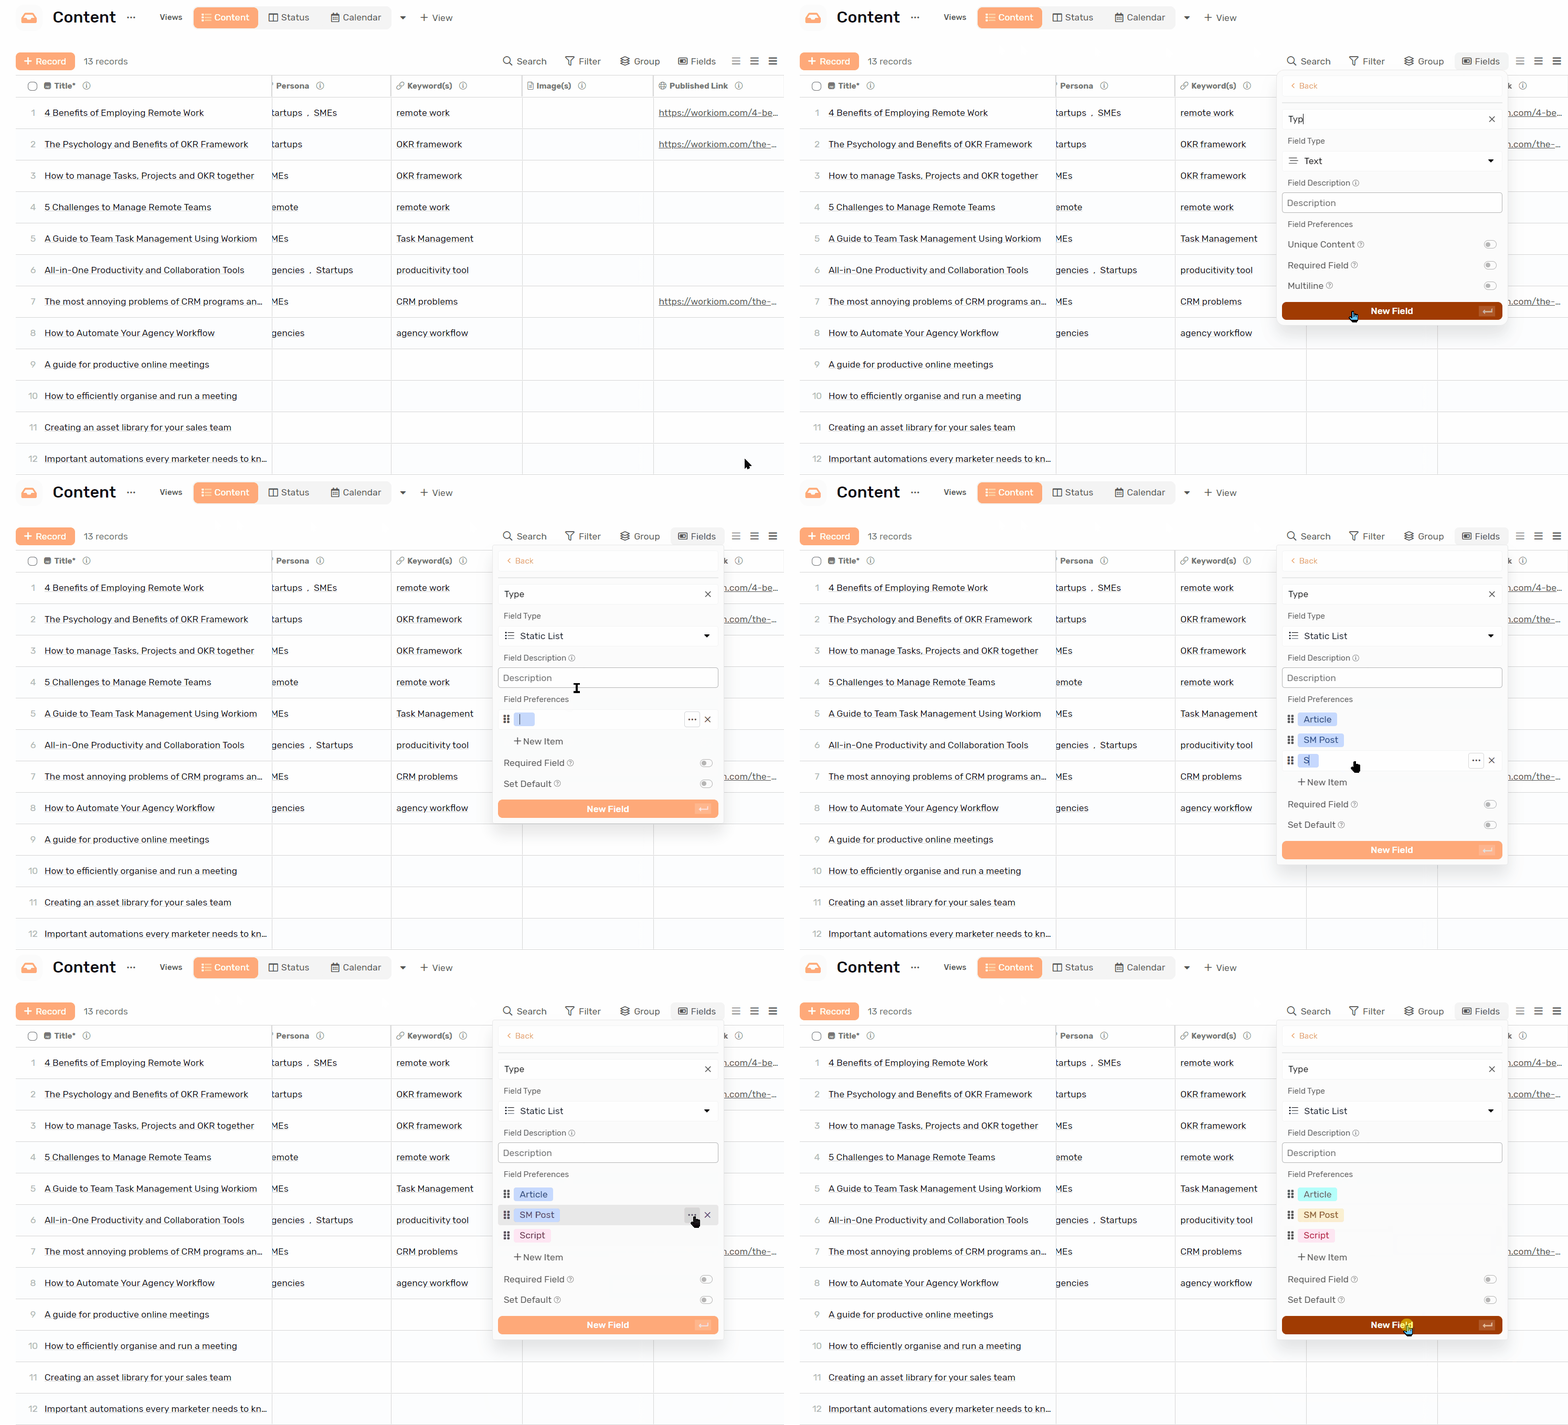
Creating a Static List field

  • Under any list click on fields
  • Click + Create New Field
  • Type in a field name
  • From “Field Type” Drop Down List select “Static List”
  • You can then start Adding Options by clicking on “+ New Item”, Each option has
    • Value, and this is the text written within the option.
    • Color, you can select the color of each option from a range of colors from the menu right next to the option.
  • You need to have at least one option to be able to create the field.
  • You can choose one of the options as a default value, so even when the creator leaves the field unchanged it will have an initial value.

Tips and Tricks

Bulk adding options

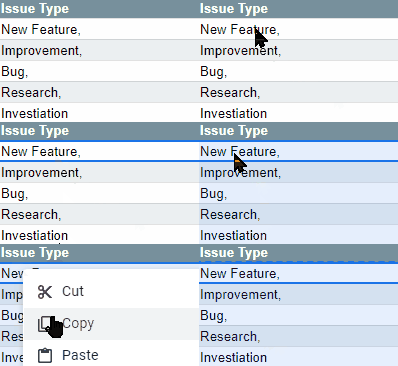
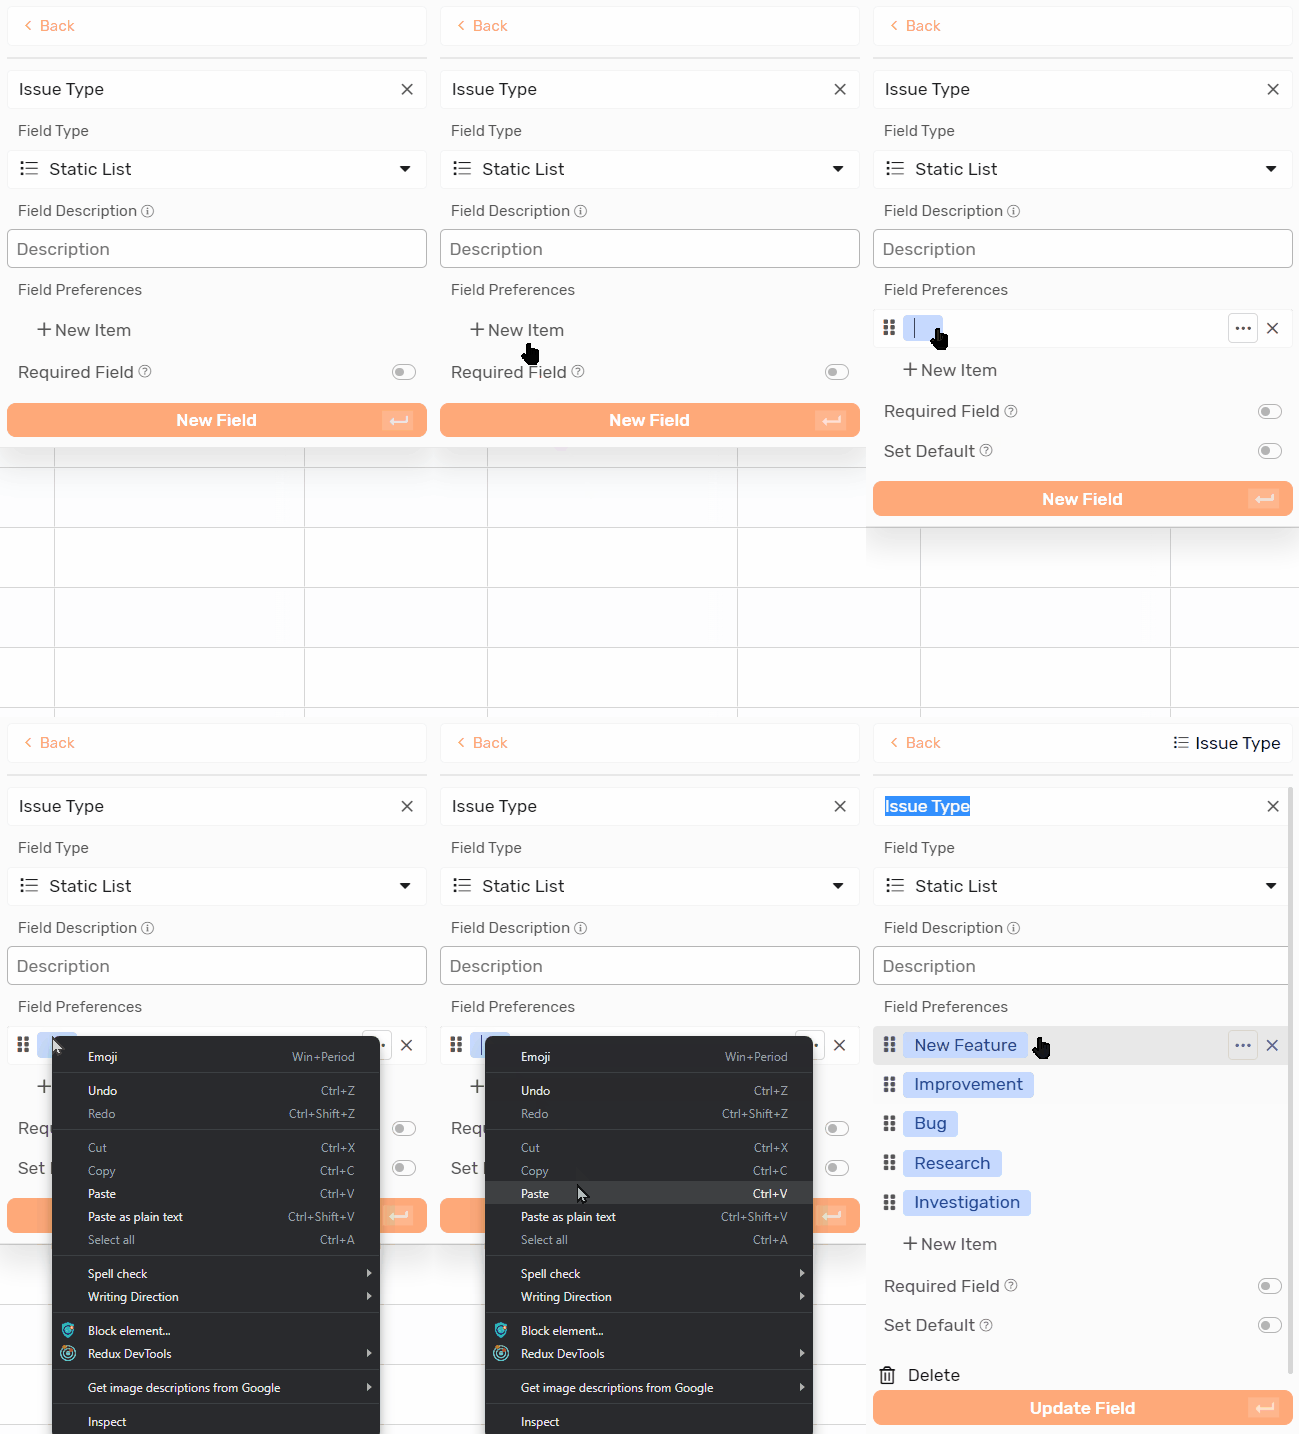
You can add options in bulk by doing the following:

  • Separating options with a comma “,”.
  • Copy the values with the commas and paste it into the option’s value.
  • The comma will act as a separator between options and multiple options will be created.

Adding Emojis

  • Using Windows
    • In the options value click Windows logo key + ;
    • The will show a list of emojis and you can start typing to find the emoji you’re looking for.
  • Using MacOS
    • In the options value click Ctrl + CMD + Space
    • The will show a list of emojis and you can start typing to find the emoji you’re looking for.
Search icon

Looking for something else?

Search by entering some keywords such as; 'email automation', 'linked list'...
Chat icon

Still need help?

If you could not find the answer to your question, please contact the support team using the chat box.