
🎬Update Record Action
Automatically update the status of a record, change the assignee based on a specific status, link a lead to an existing contact if the phone number matches, and much more can be achieved with this action.
Transcript
Getting Started
- To start go to Automations under any app
- Click create the + Automation button at the top-right corner
- Select the desired trigger and add the necessary conditions
- In the action step select “Update Record”
- Please note that if you select Webhook, or Recurring as trigger you can’t use update record unless you select it as a sub-action of Find Record.
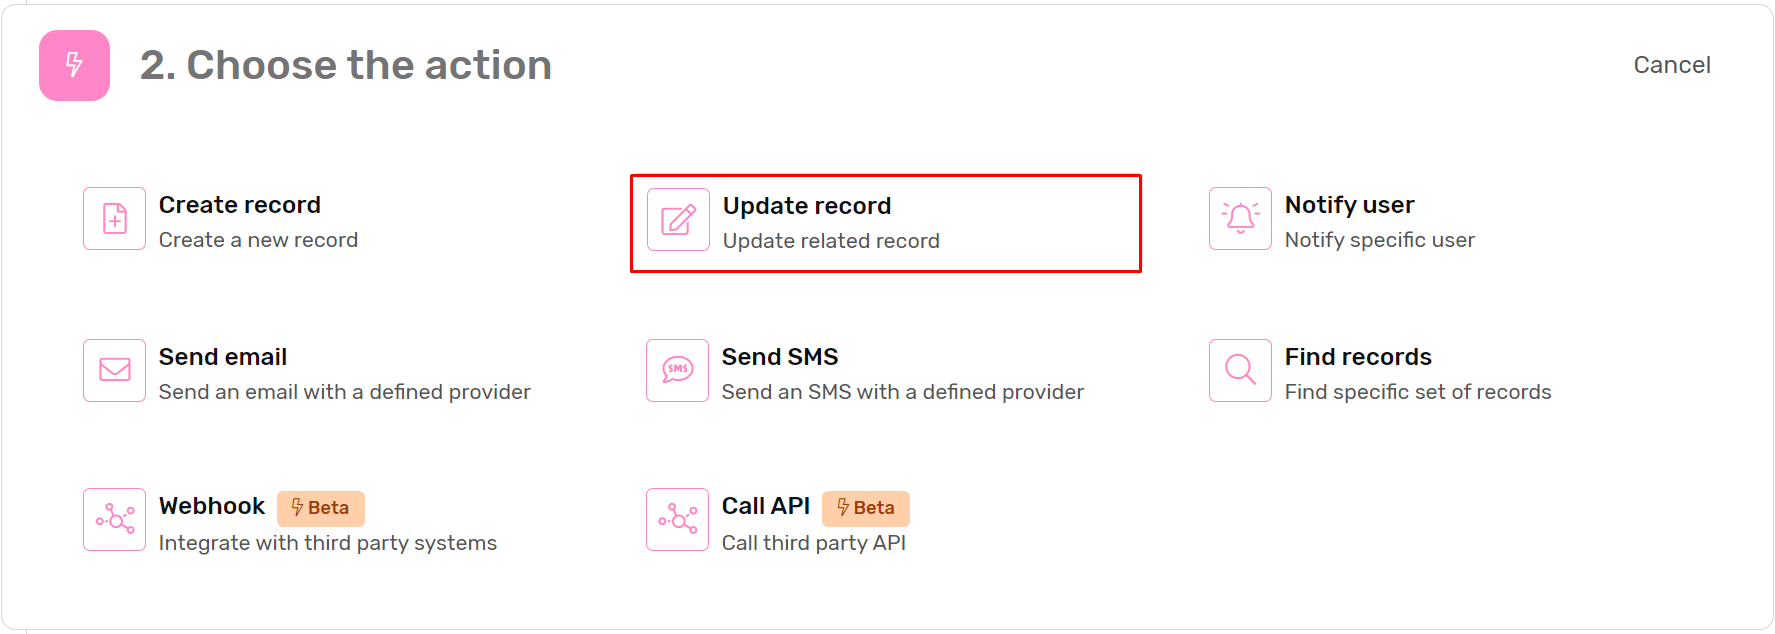
- In the next step you will select the record that will get updated, you will notice that the options are
- Triggering Record: This is the record that caused the automation to trigger.
- Triggering Record - Linked: You can select any record that is linked to the Triggering Record through a linked list field.
- Output Record: if you’re using Find Record, this will select the record that matches the find criteria.
- Output Record - Linked: You can select any record that is linked to the Output Record through a linked list field.
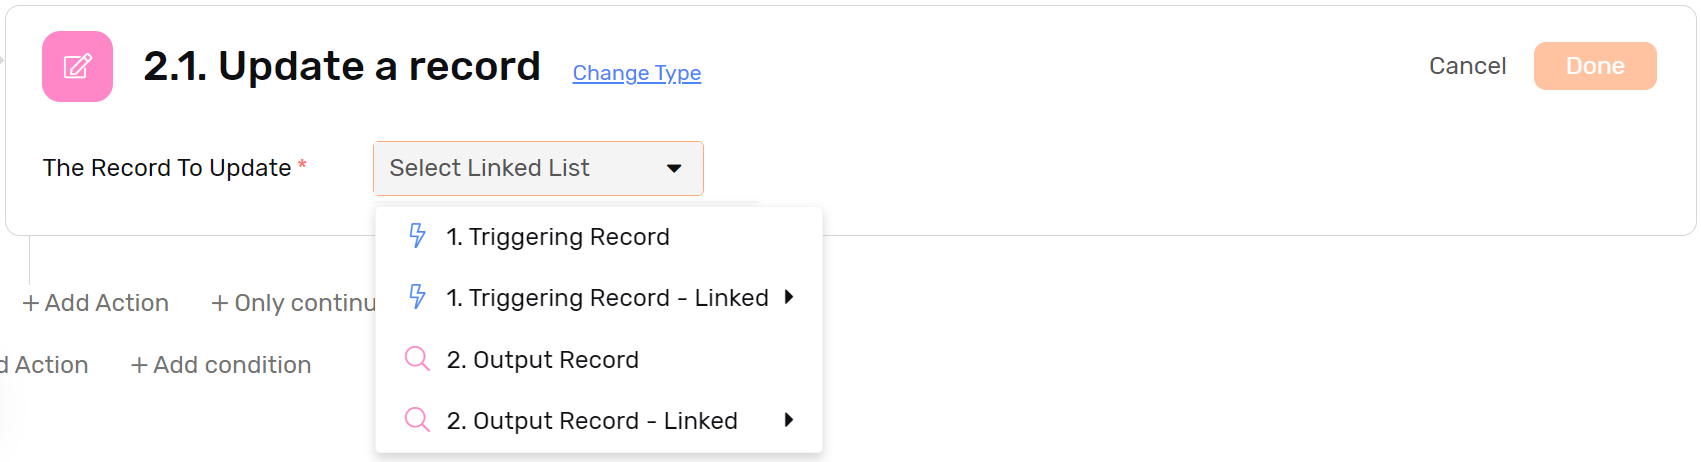
- Each of the options mentioned above will be preceded by a number, the number refers to the automation step.
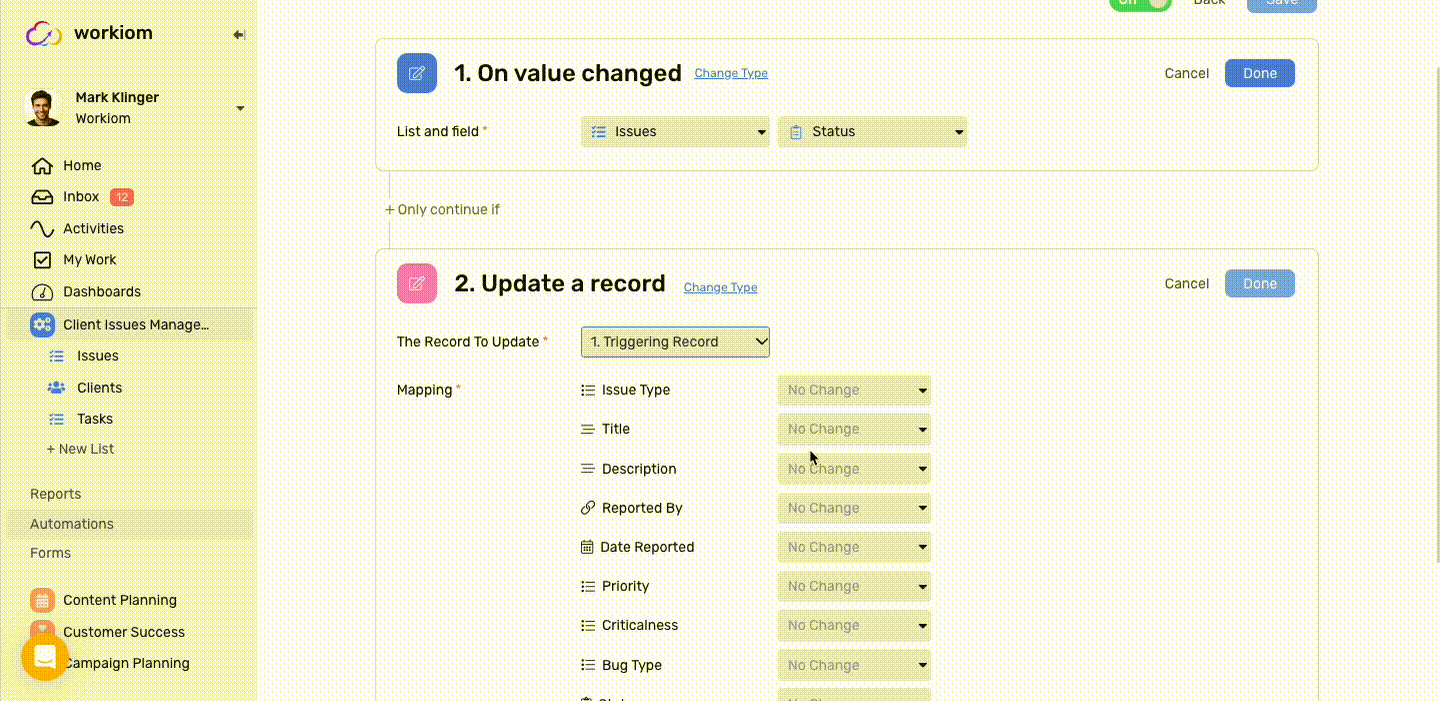
- Then you can map the values you’d like to fill the fields of the records that will be updated.
- Hit done, and you’re good to go!
Previous Values
If you need to use the value of the fields before the update that triggered this automation, follow these steps to access and map the "Previous Values."
- While mapping, select Dynamic.
- Scroll down to the bottom of the values list.
- You will find an option labeled Previous Values.
This option will map the values of the fields as they were before the most recent update that triggered the automation.
Case Studies
Case 1
- Install the SaaS Product Management template
- Go to Automations
- Check the automation named “Bounced” you will notice the following:
- The trigger is Record updated, and it’s monitoring the Status field
- The condition is
{{Status}} = #Planned# and {{Went To Testing}}which means the action will only get executed when the task had been through Testing and then returned to “Planned” - The action is Update Record, it will simply reassign the task to whomever worked on it in the first place.