Invite and Manage Memebers
Invite your team members to your account to benefit from collaboration features on Workiom.
Transcript
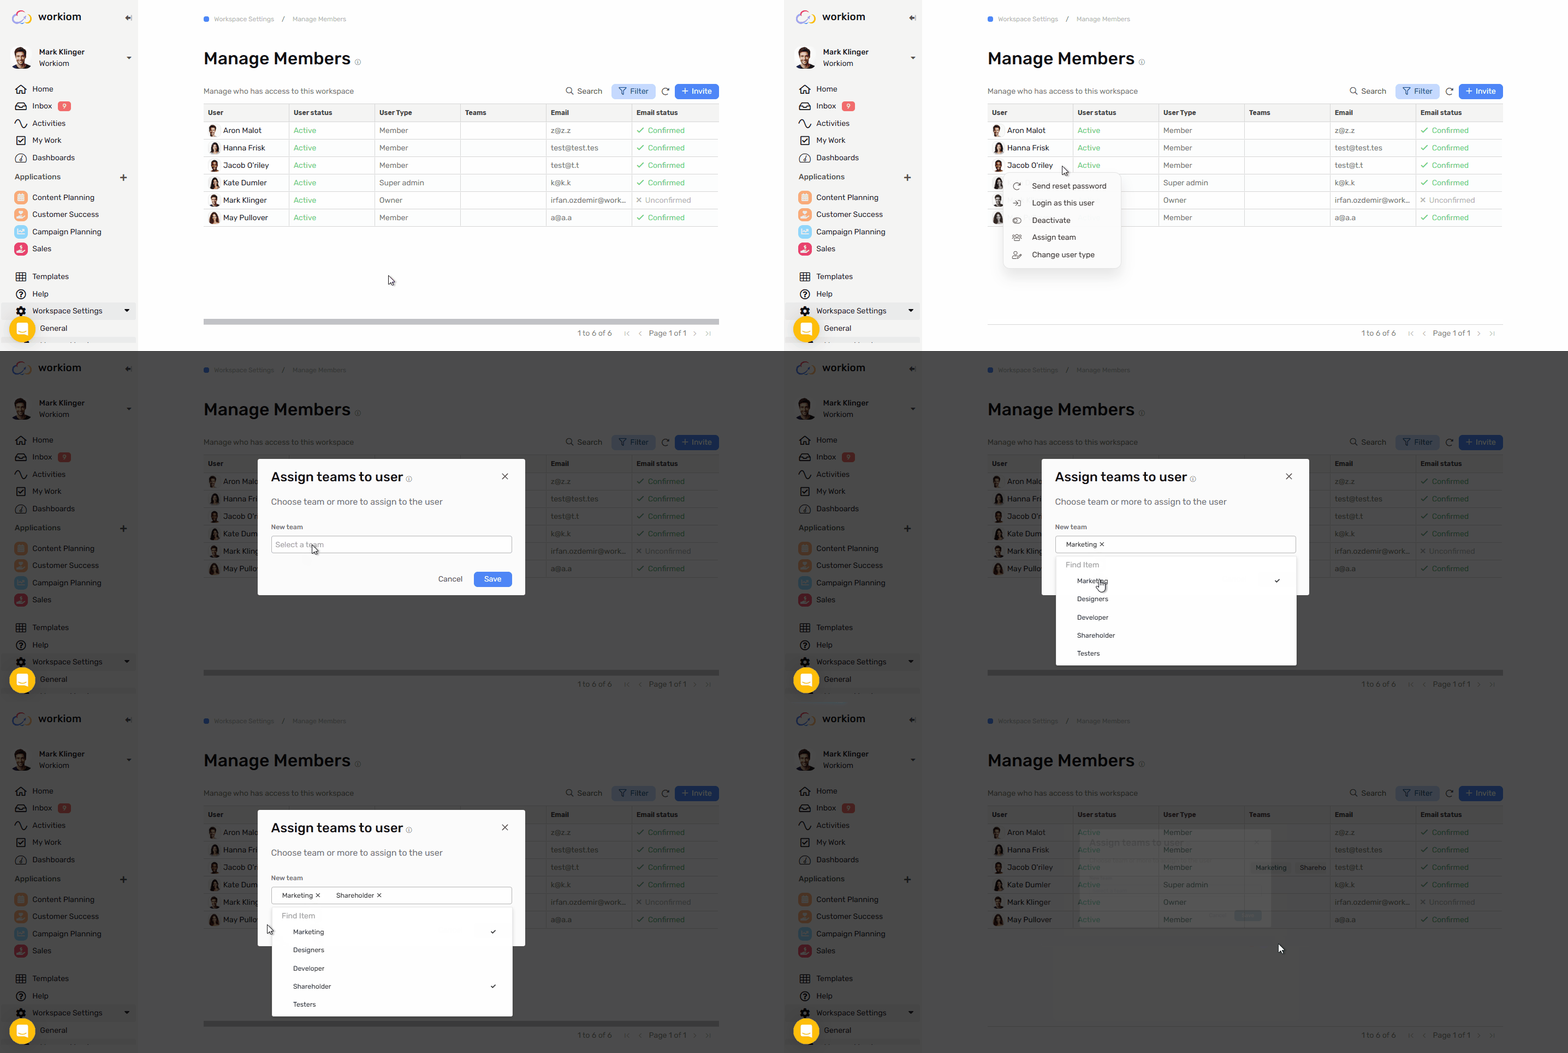
Invite new user
To invite your teammates
- Navigate to workspace settings
- Click Manage members
- Click “+ Invite” button
- In the invite dialogue you can write multiple emails separated by commas “,” to invite multiple users at the same time.
- You can also select the role of the user while inviting them.
- The users will receive an email when invited to complete their sign up process and join the workspace.
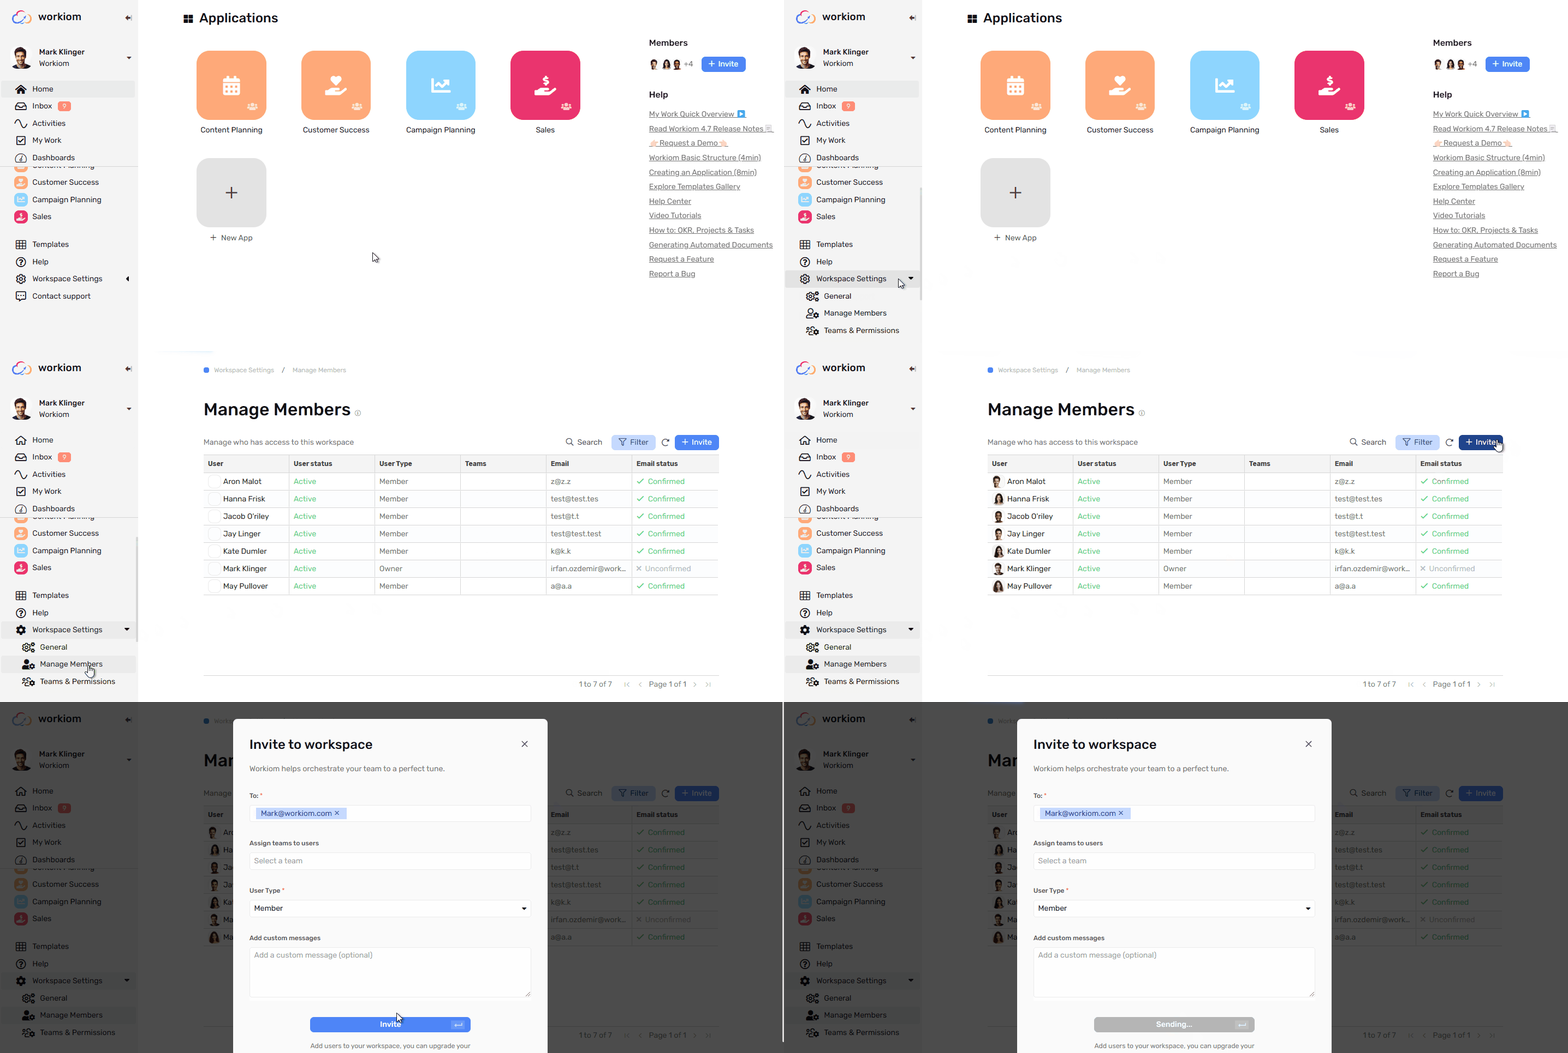
Invitations options
Resend invitation
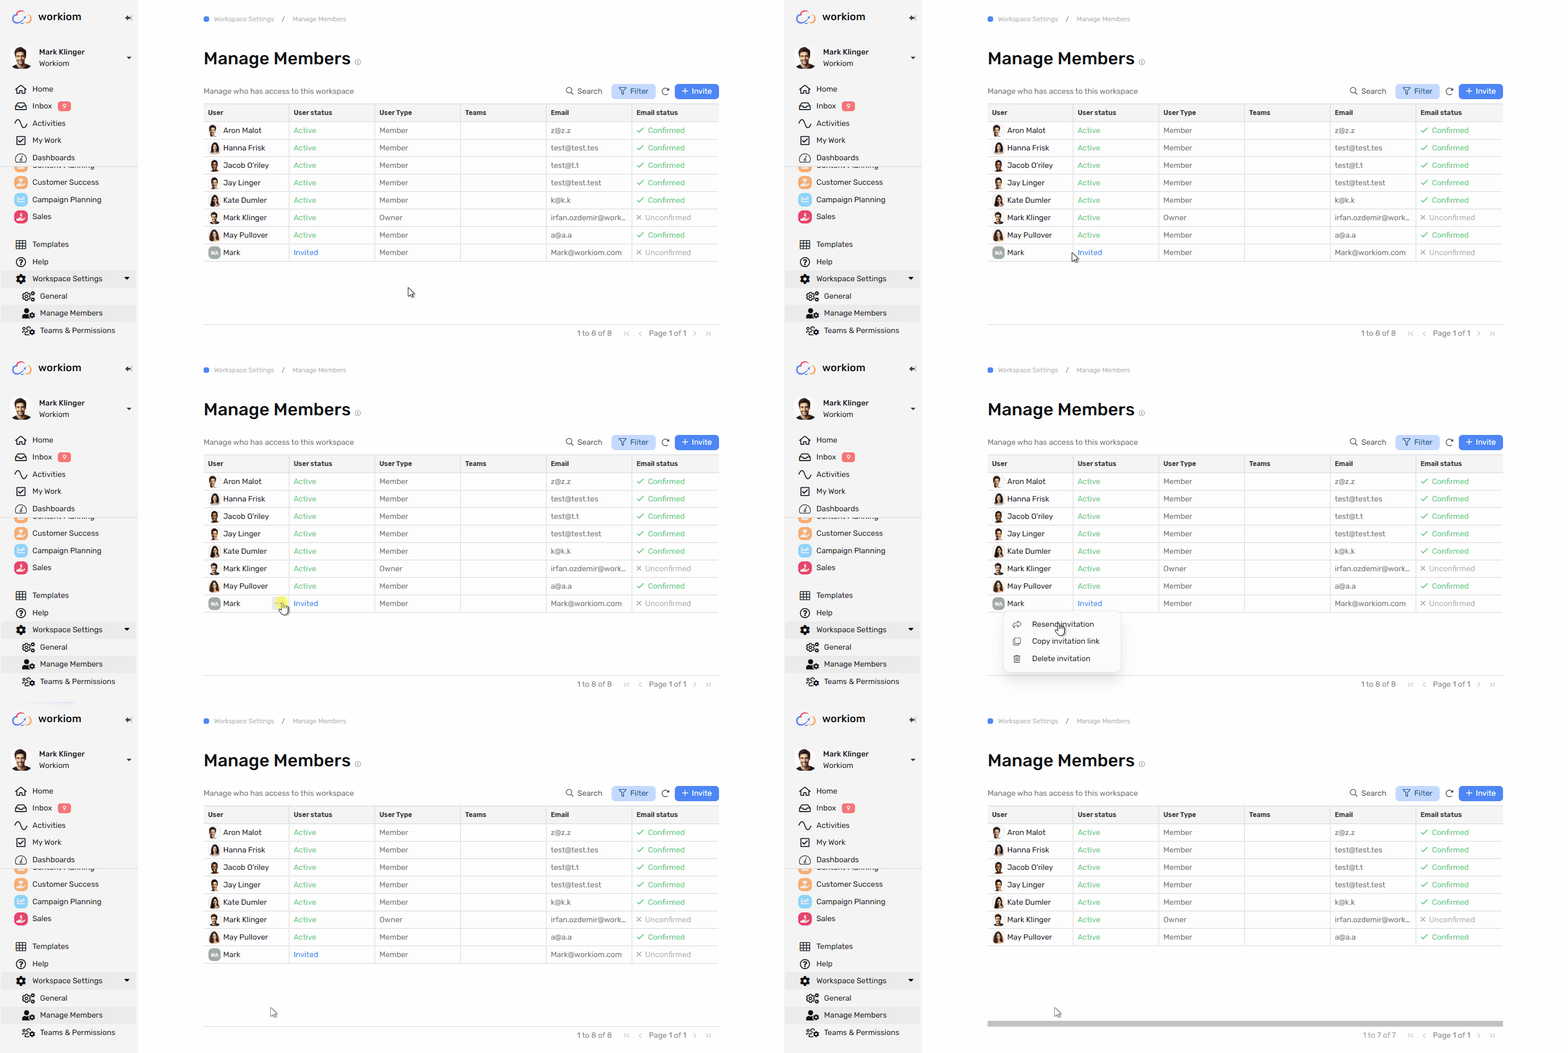
You can resend the invitation to user in case they didn’t receive it the first team, simply do the following:
- Hover over the user
- Open the 3 dots menu
- Click “Resend invitation”
- This will send an email to the user to accept the invitation and complete the signup process
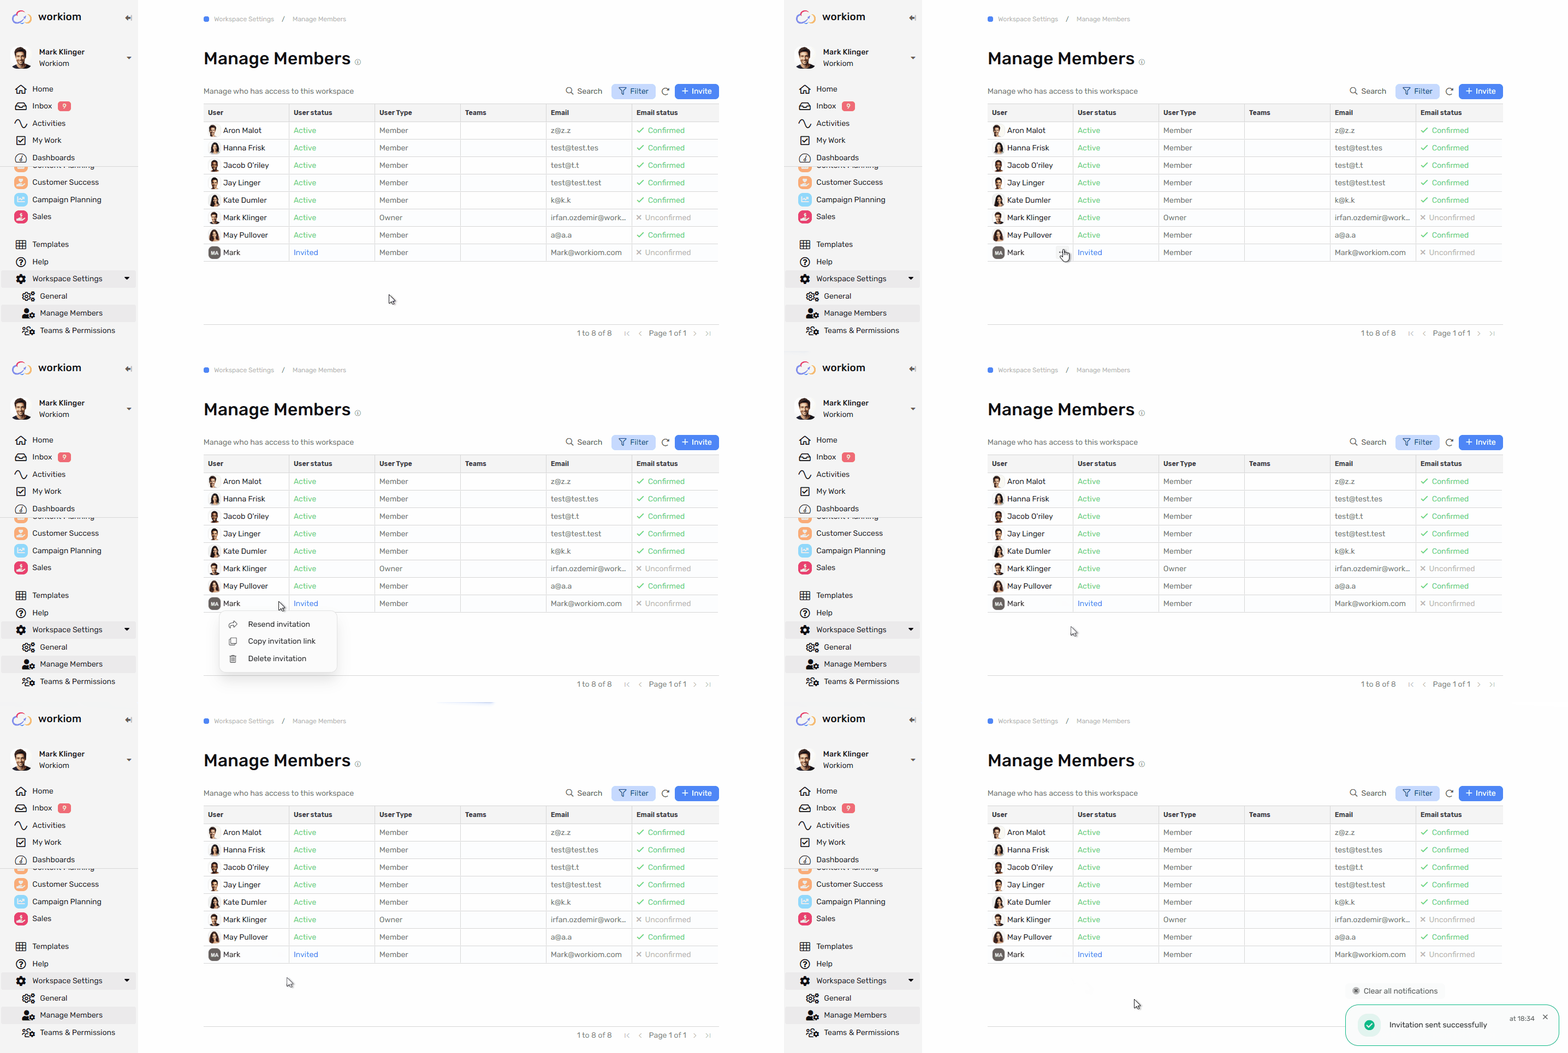
Copy invite link
You can invite your teammates through other channels
- Hover over the user
- Click the 3 dots menu
- Click copy invite link
- Got to your preferred channel
- Paste the link and send it to the teammate you’d like to invite to the workspace
Delete invitation
If you no longer wish to have a particular user join your workspace, before they accept the invitation you can:
- Hover over the user
- Click the 3 dots menu
- Click delete invitation
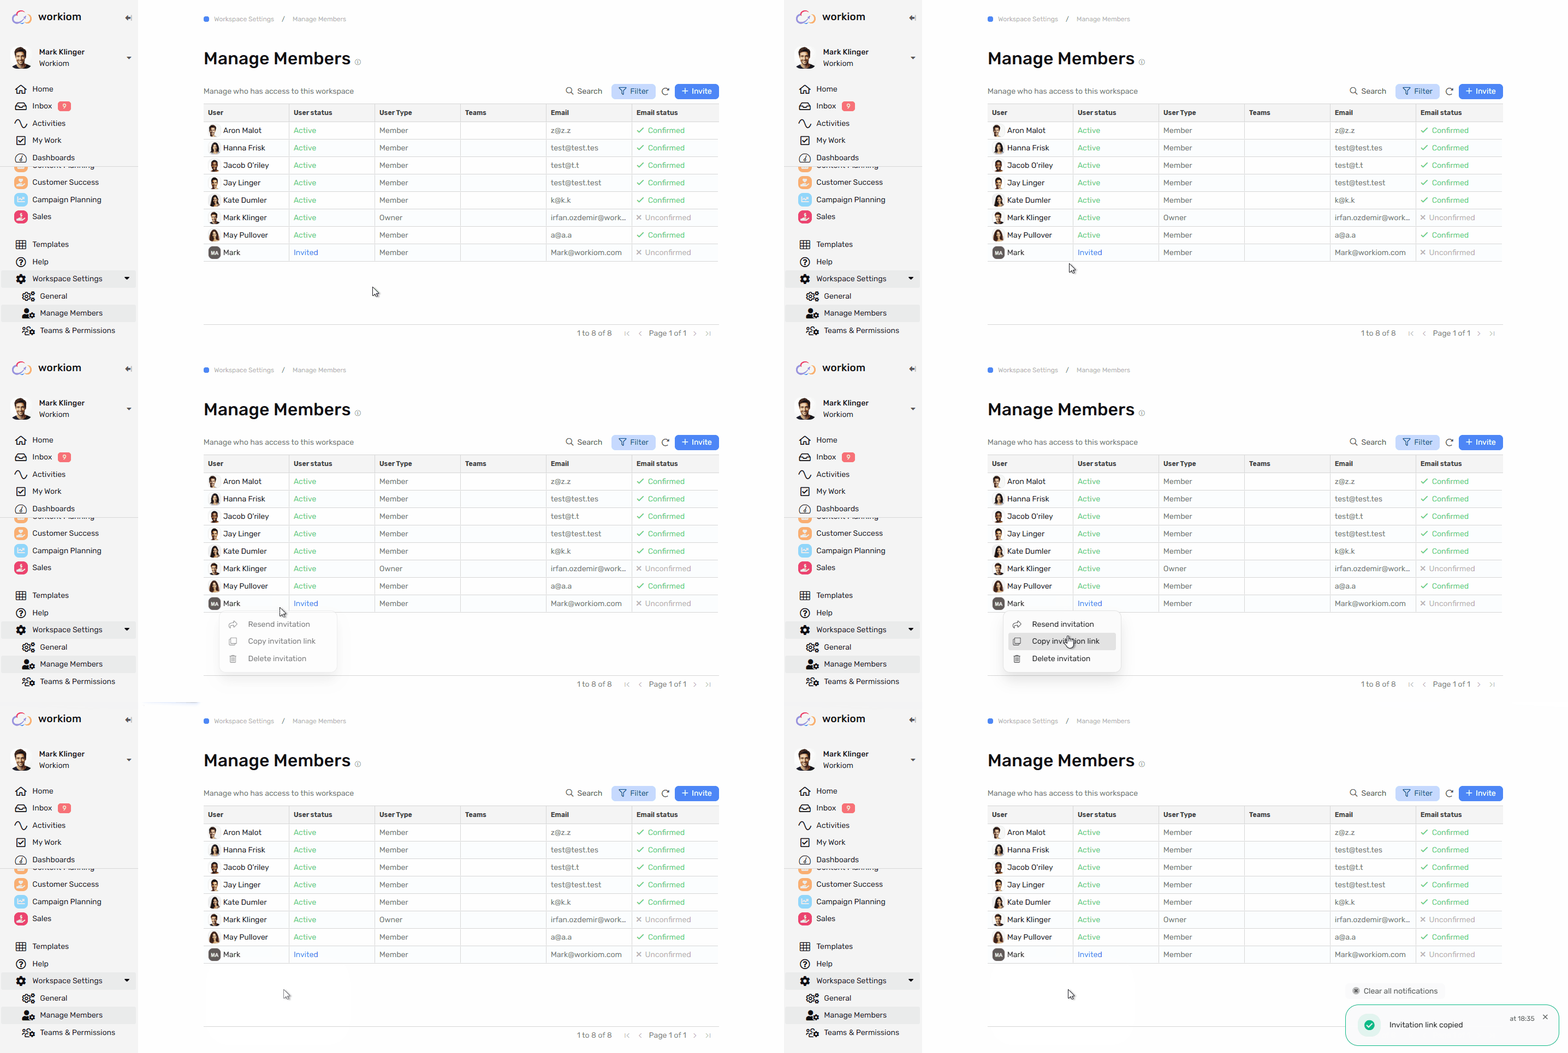
User options
Deactivate user
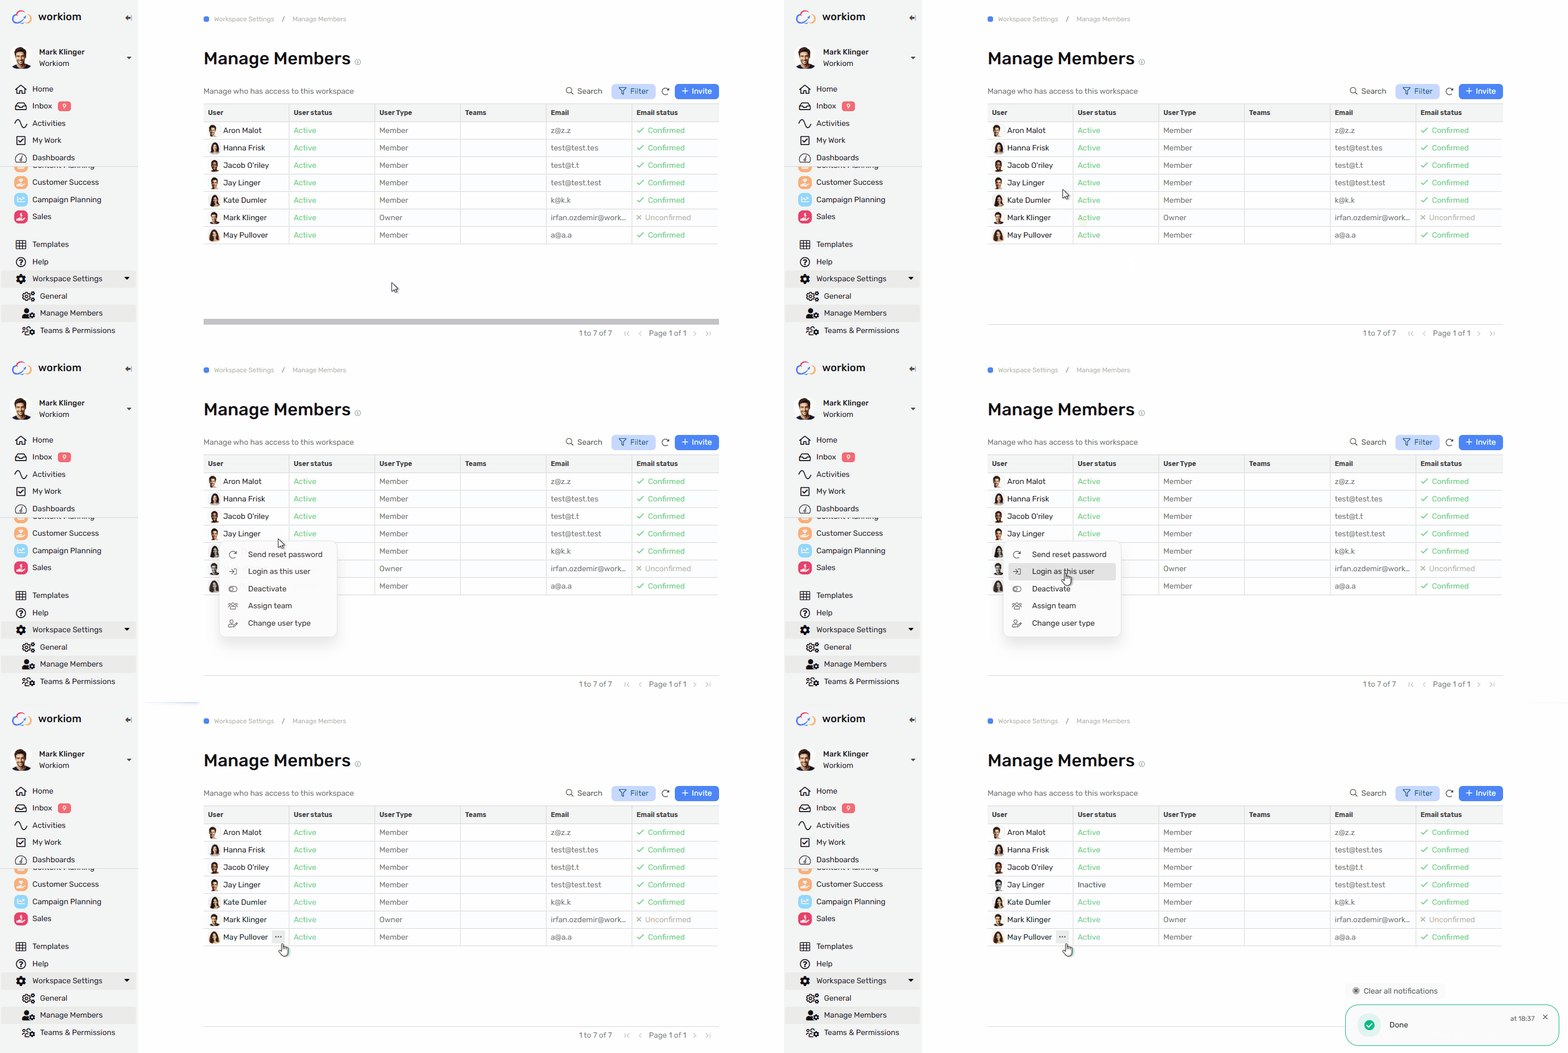
When a user no longer needs to log on the workspace you deactivate their account:
- Hover over the user
- Click the 3 dots menu
- Click “Deactivate”
- The user will no longer be able to log on to the workspace
- This will free their seat and other users can be invited
Change user type
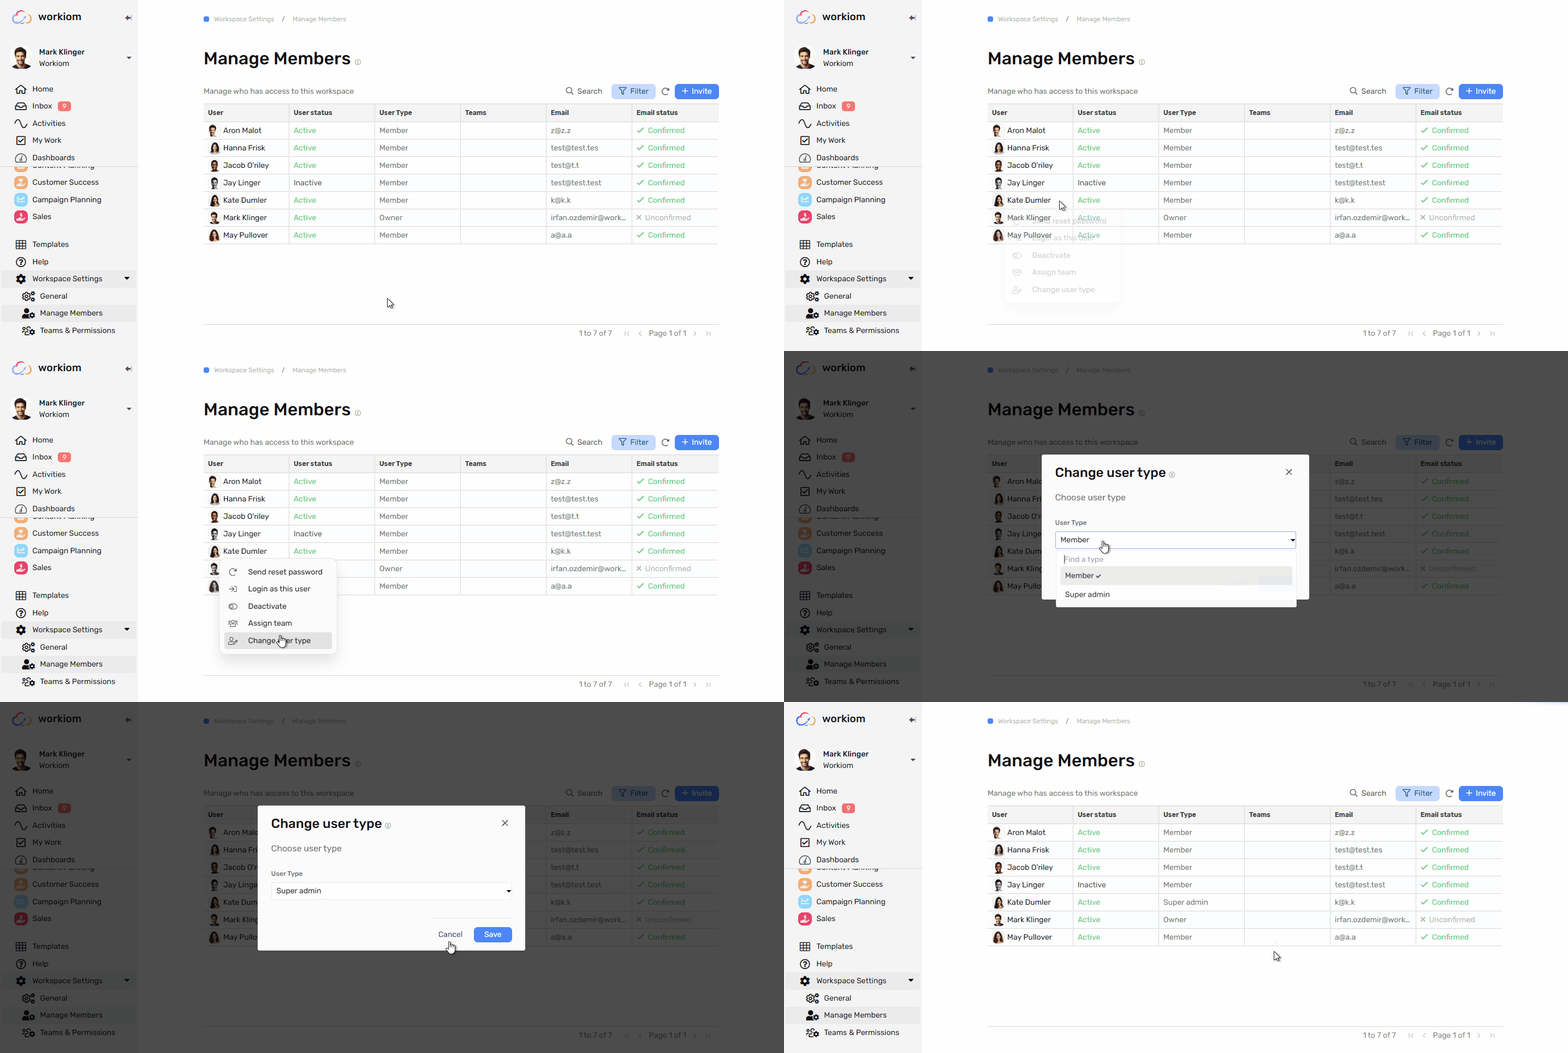
You can change the user type based on the level of access they need
- Hover over the user
- Click the 3 dots menu
- Click change user type
- Select the type that is most appropriate for this user
Assign team
You can assign the teams to users to grant them the permissions assigned to that specific team
- Hover over the user
- Click the 3 dots menu
- Click Assign team
- Select all the teams you want the user to be a part of
- Click save
