Table View
Table view gives you a quick look at a big set of records with their details at a glance, if you’re big on the spreadsheet experience with richer viewing options this is the view for you.
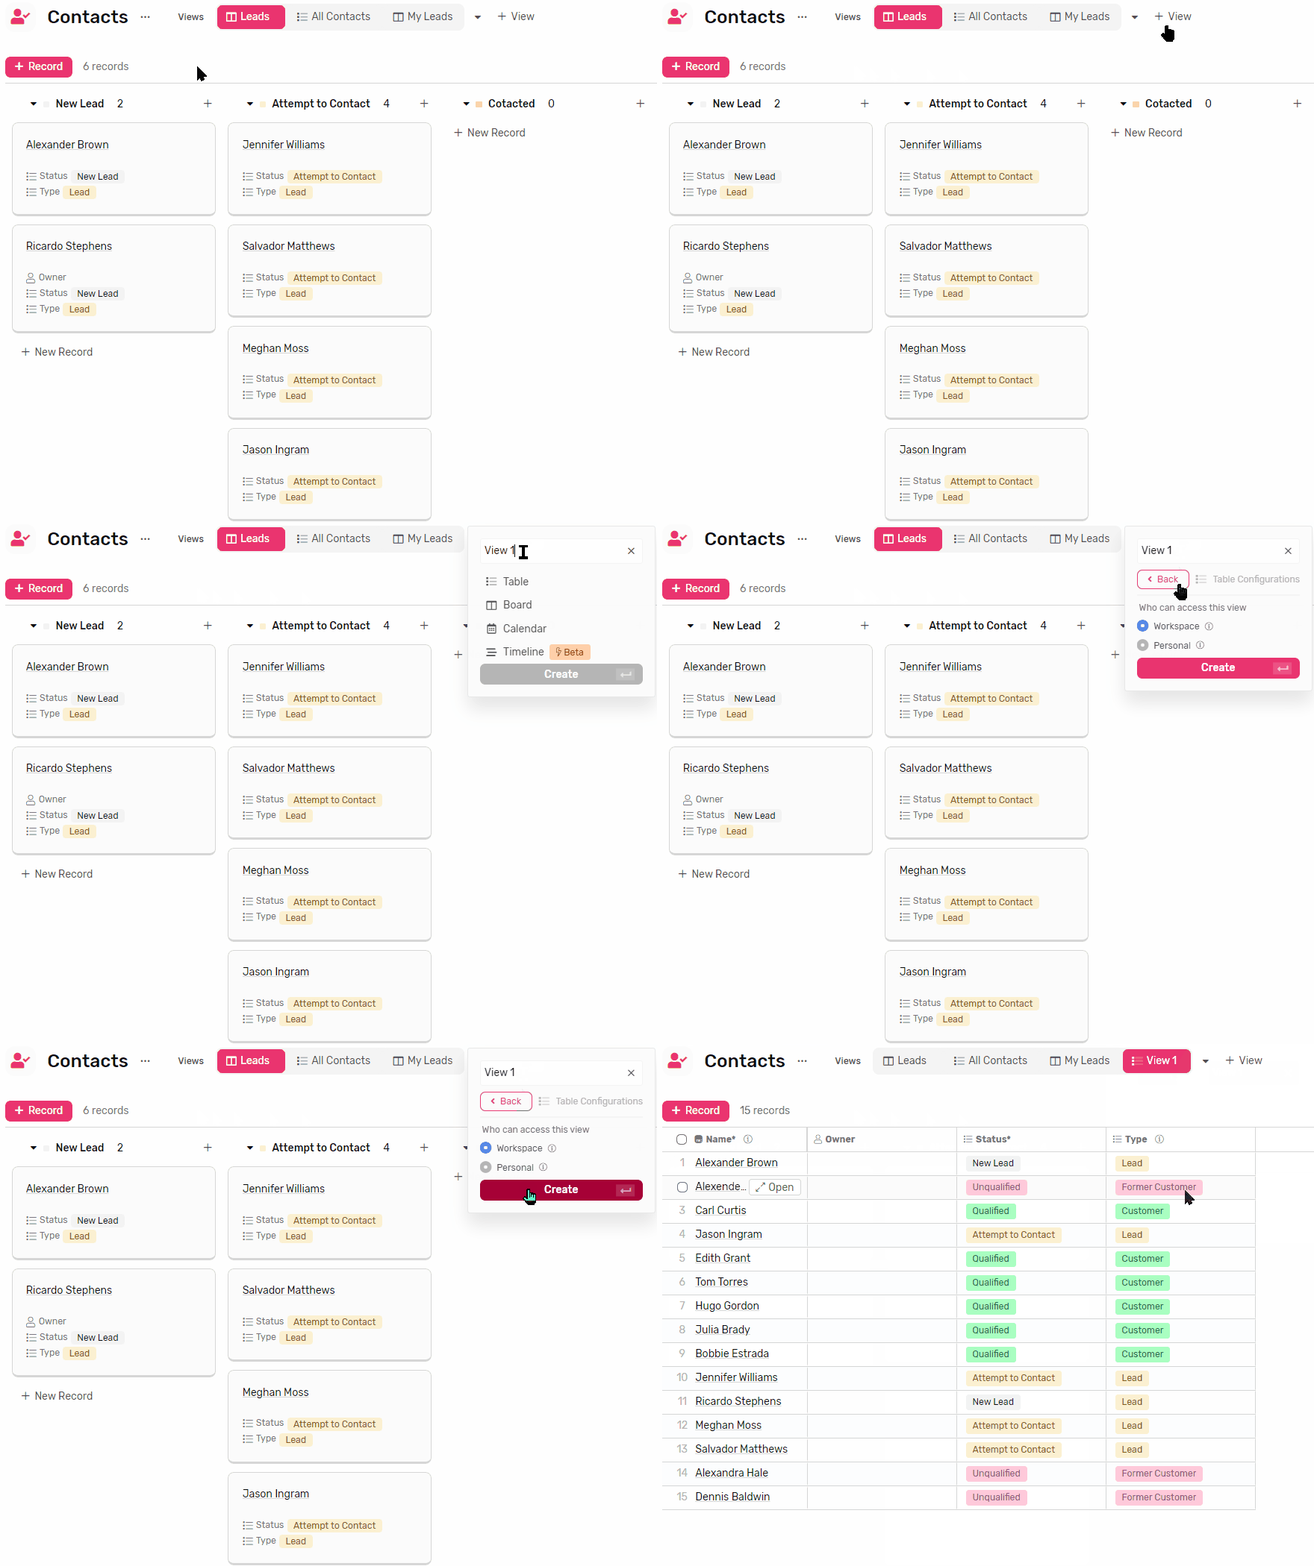
Creating a Table View
Table view is available by default with every new list that you create, and here is how you create more:
- Under any list click on the + View button
- Name the view
- Select Table
- Click Create, and you have your new Table view.
View options
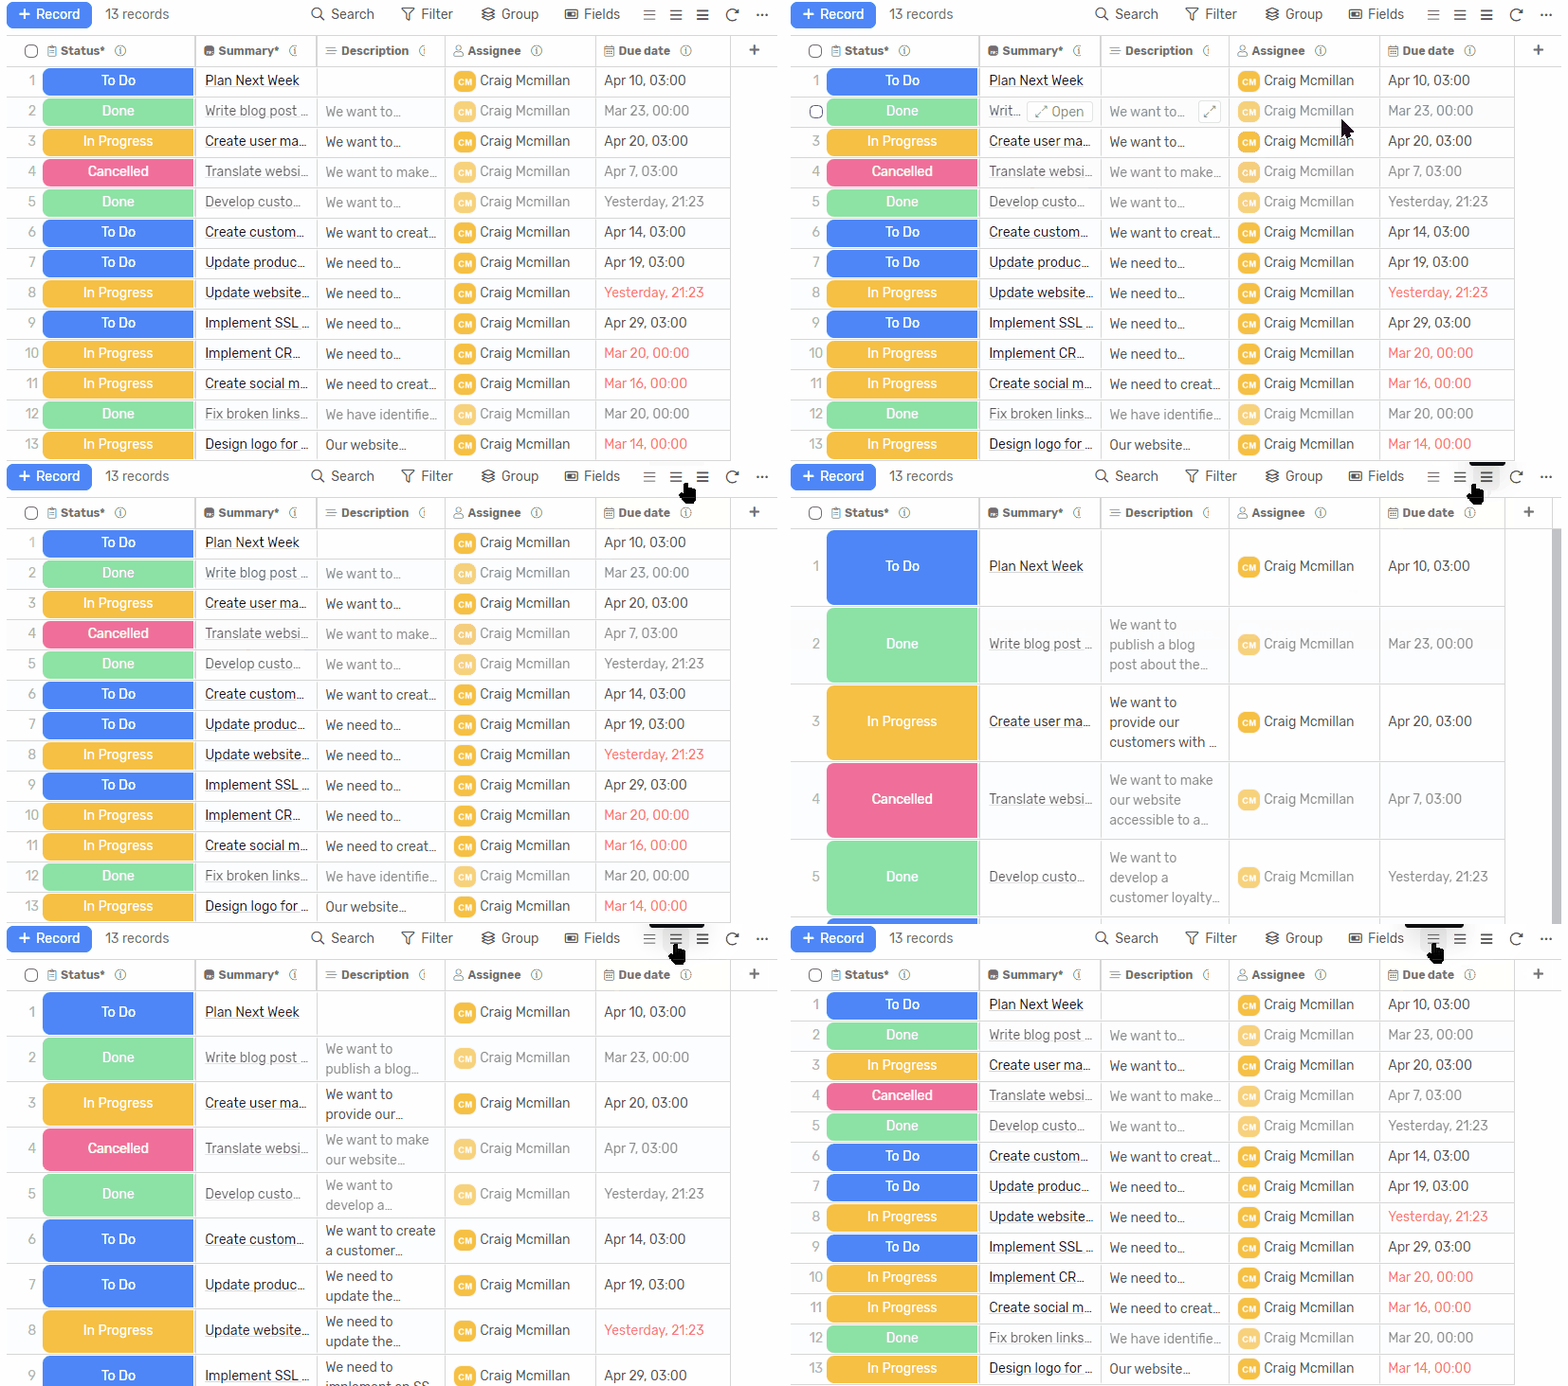
Density
Normal
The recommended viewing density with:
- Vertical space for each row to display enough information without going much into details.
- Comfortable to the eye.
Full
- Gives each row more vertical space
- Ideal if you’d like to see the full content of each field without going into the records details.
Minimal
- Fit more rows into the view
- Ideal for a holistic view of many records at a glance
Fields (Columns)
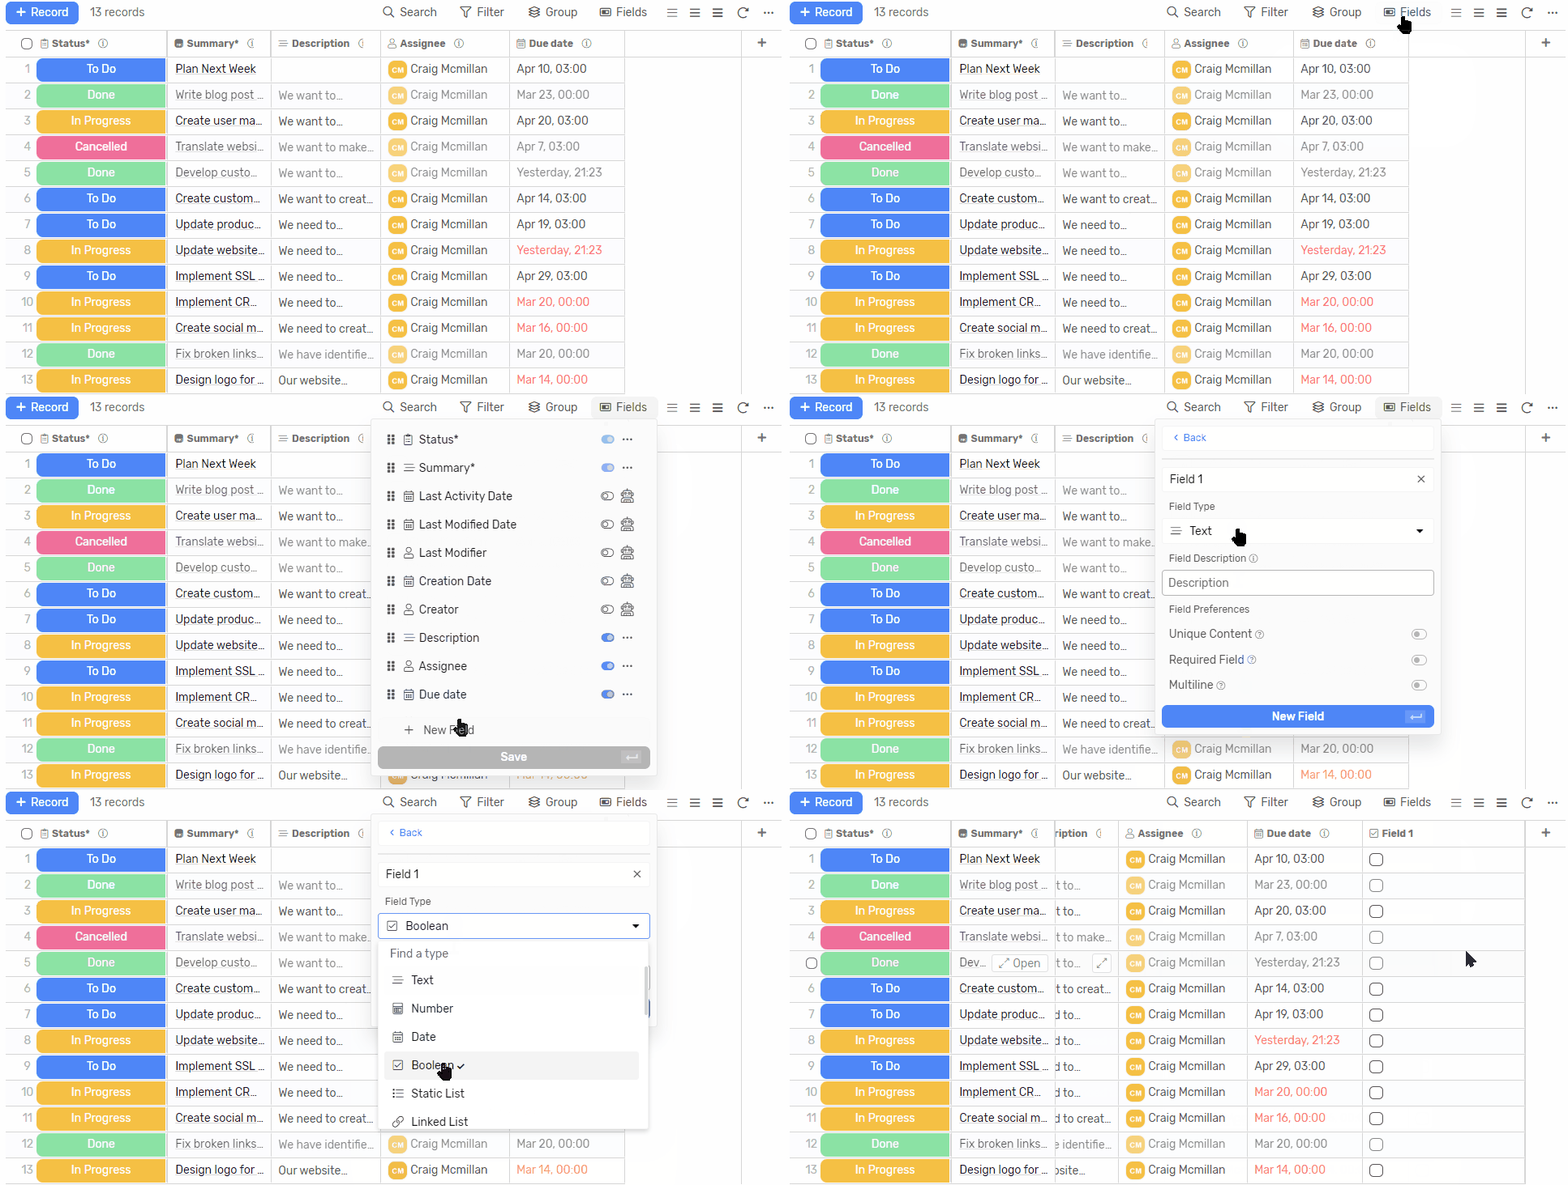
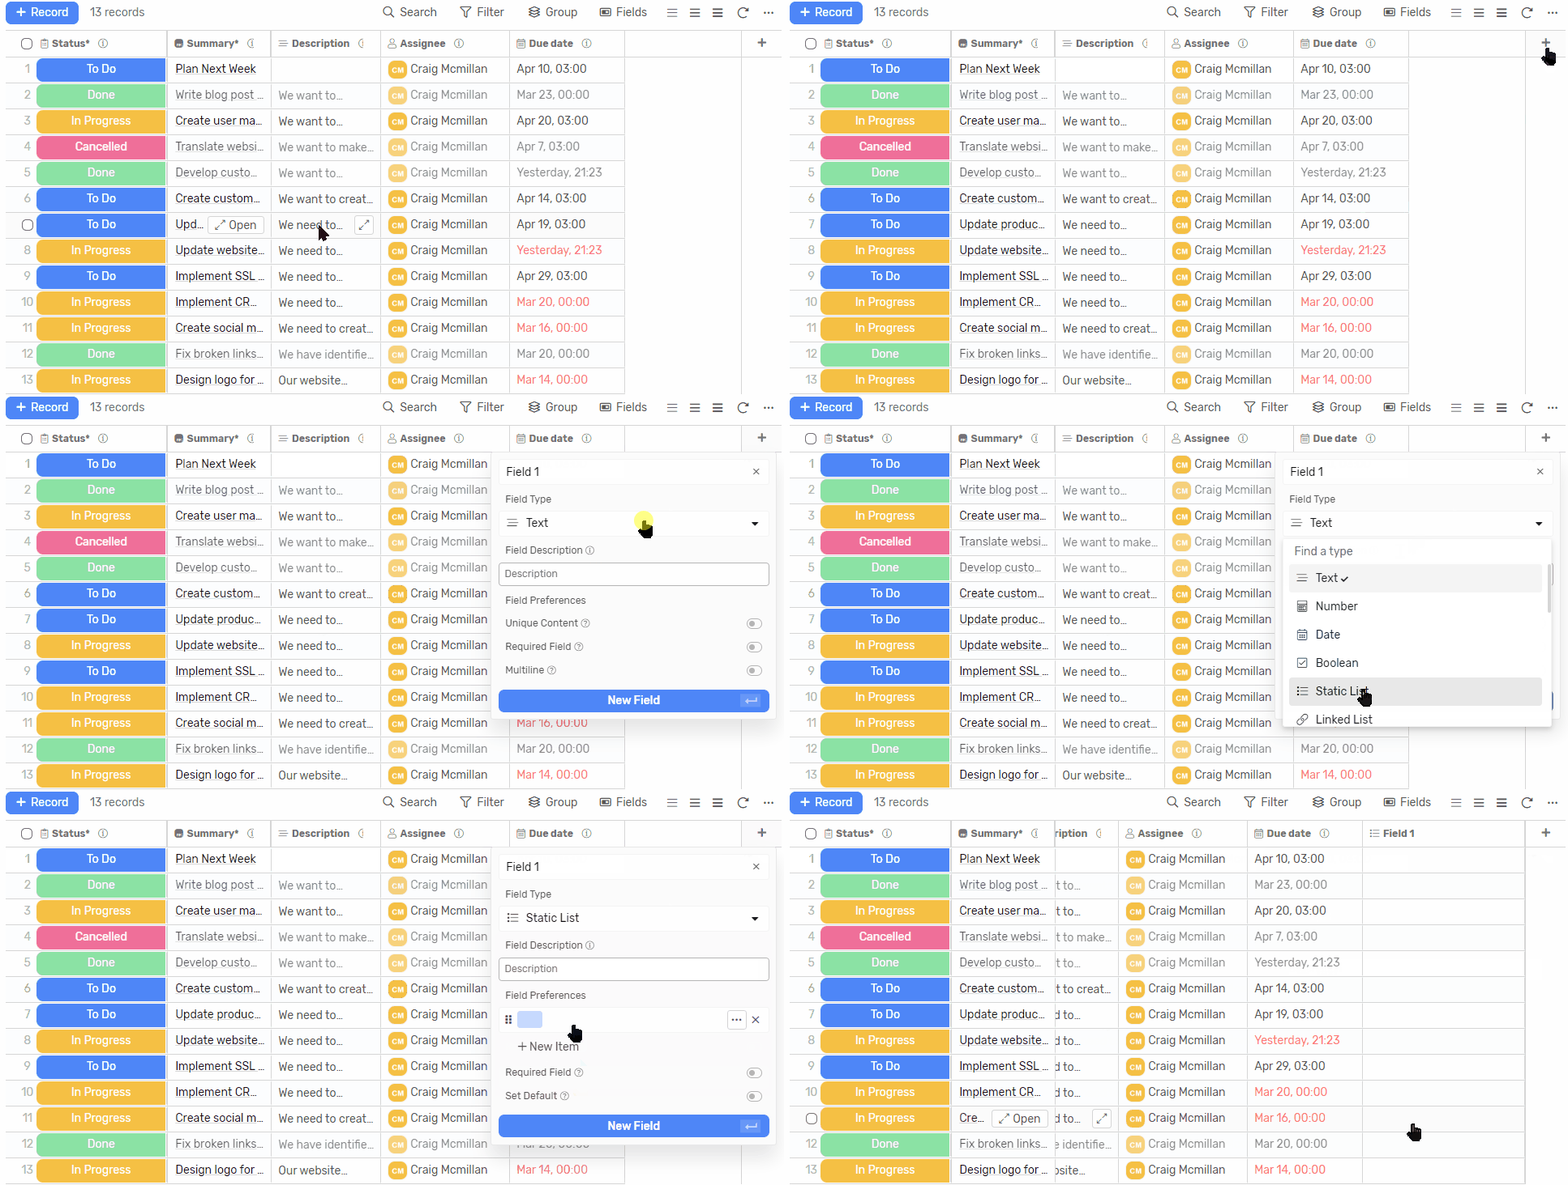
Creating a new Field
Method 1
- Click on the Fields drop down menu
- Click + New Field
- And then continue to customize your field
Method 2
- Click on the + sign at the top right corner of the table
- And then continue to customize your field
Show/Hide Fields
Method 1
- Click on the Fields drop down menu
- Use the toggle next to each field to show/hide
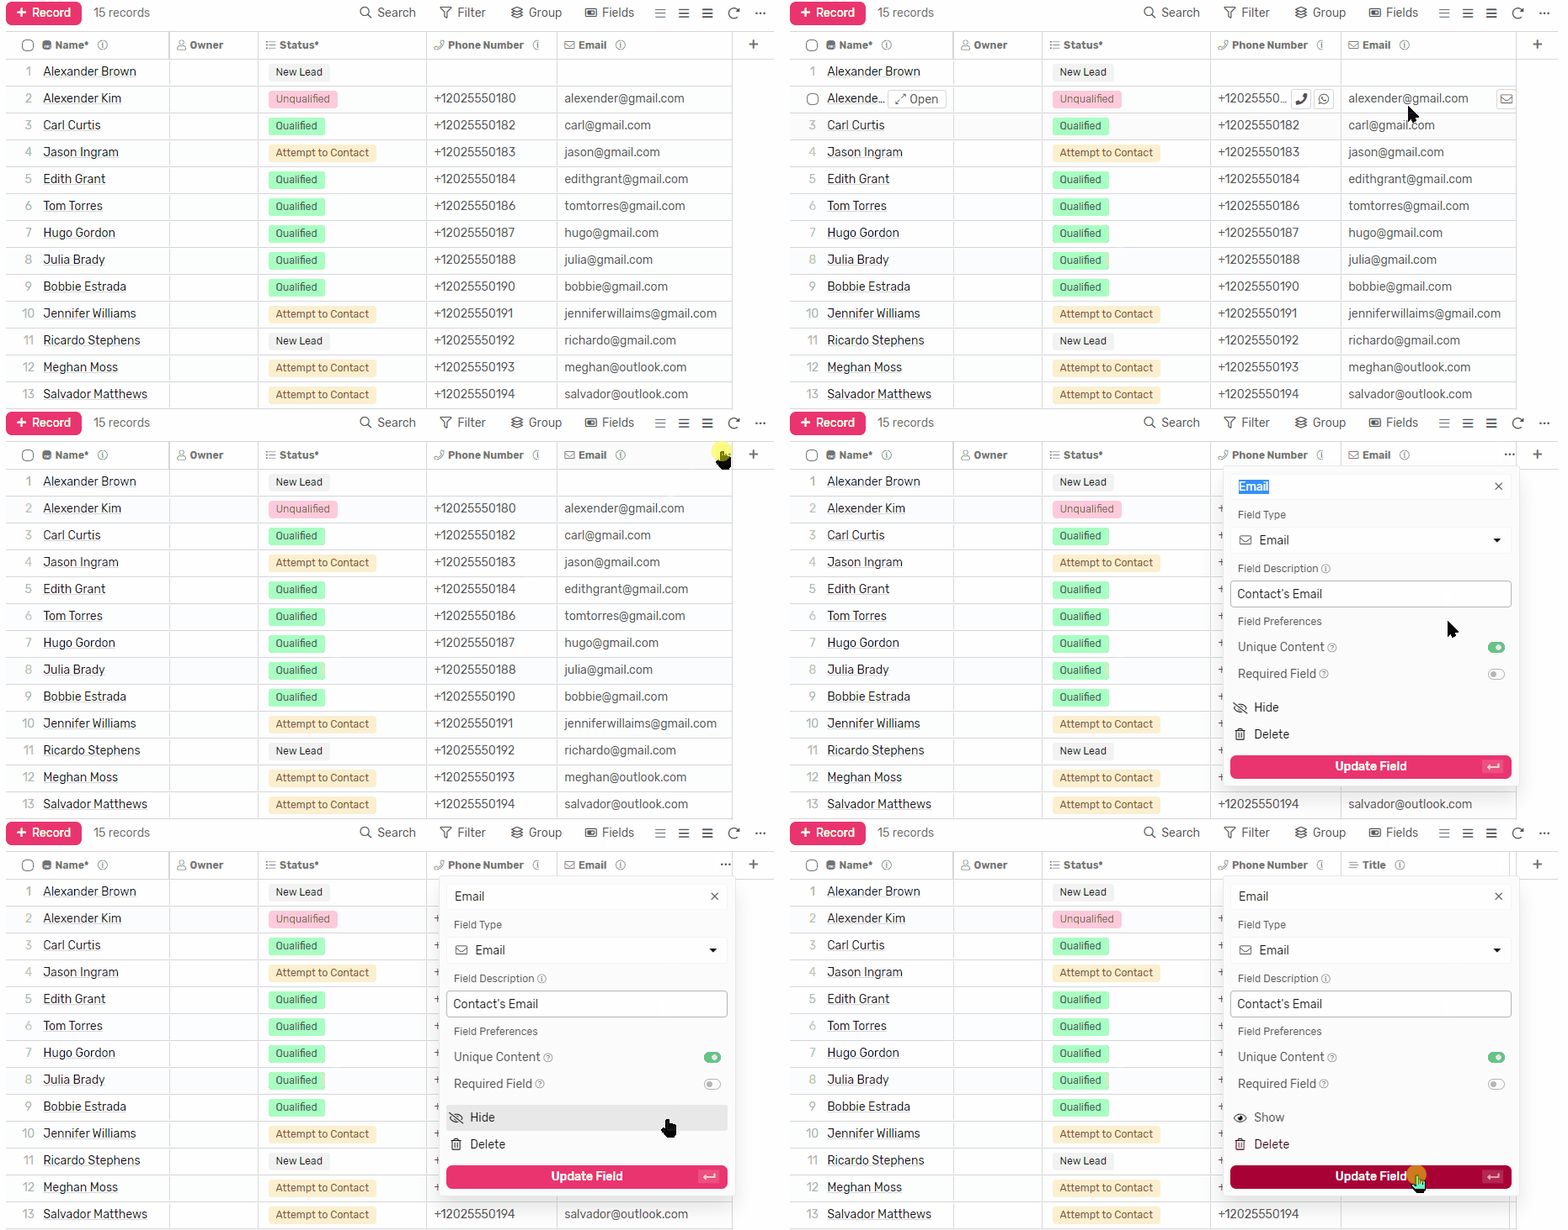
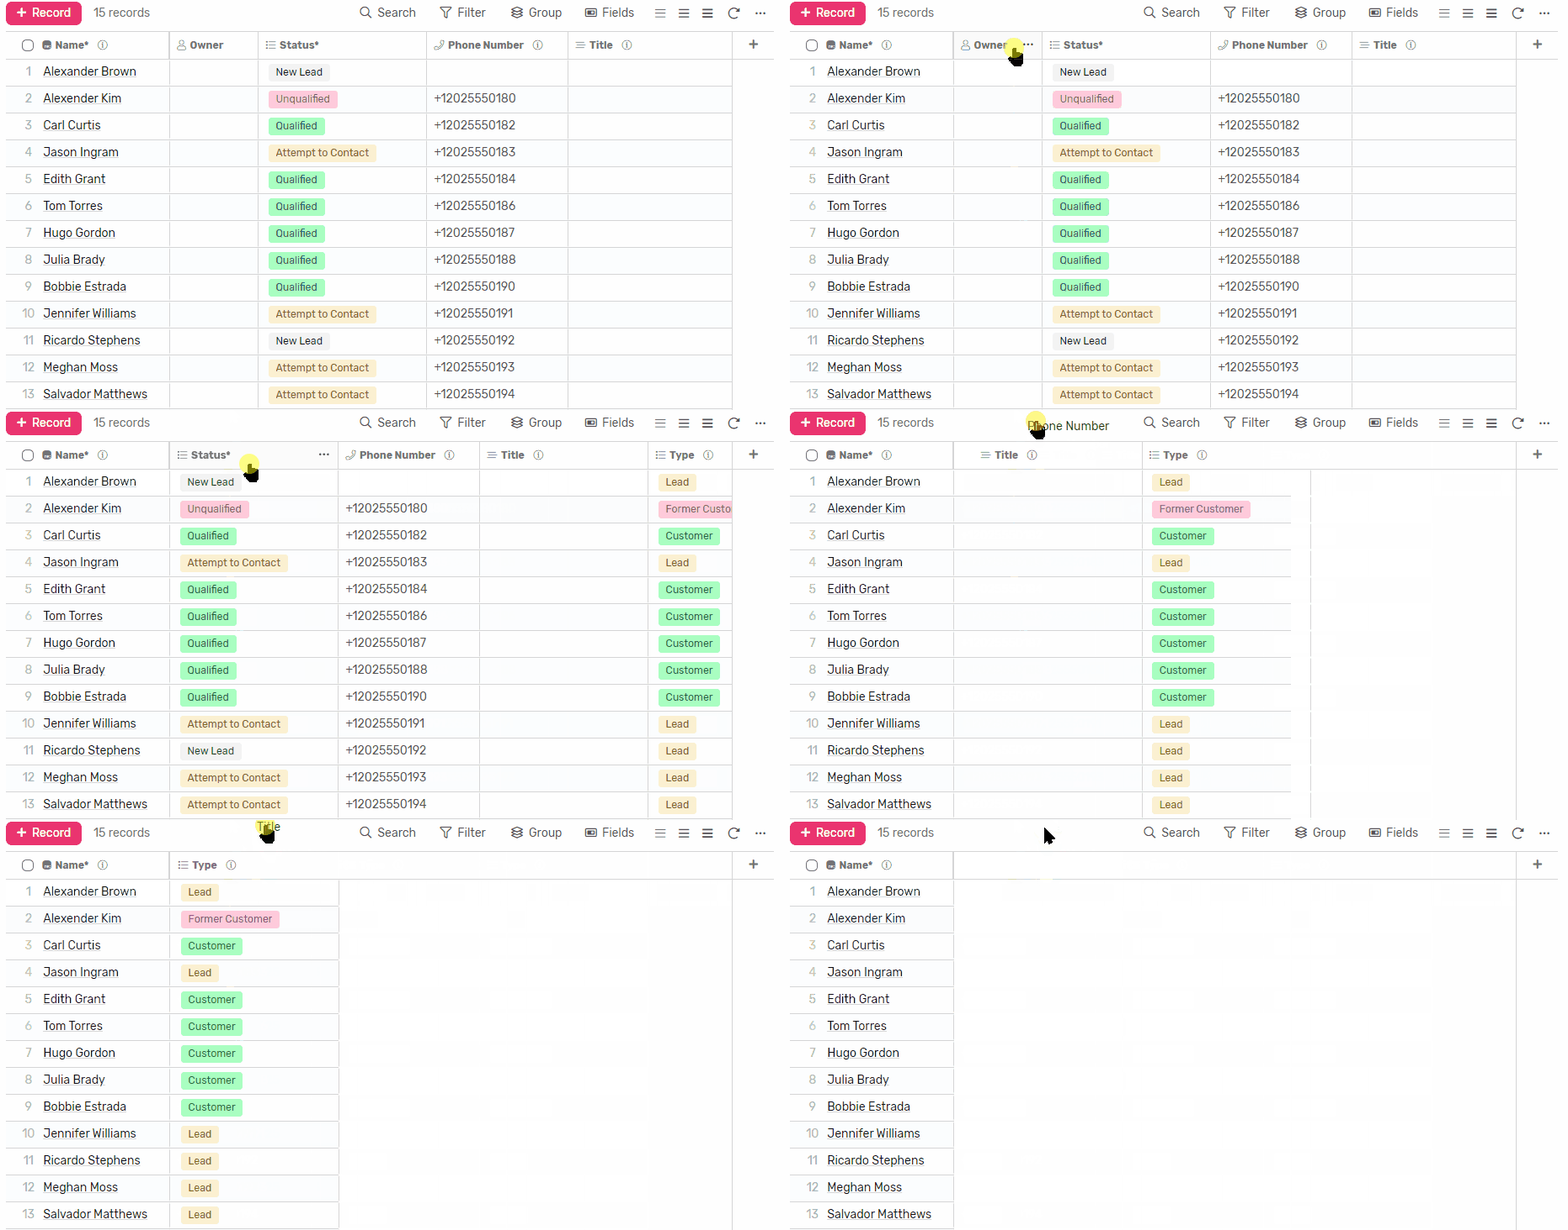
Method 2
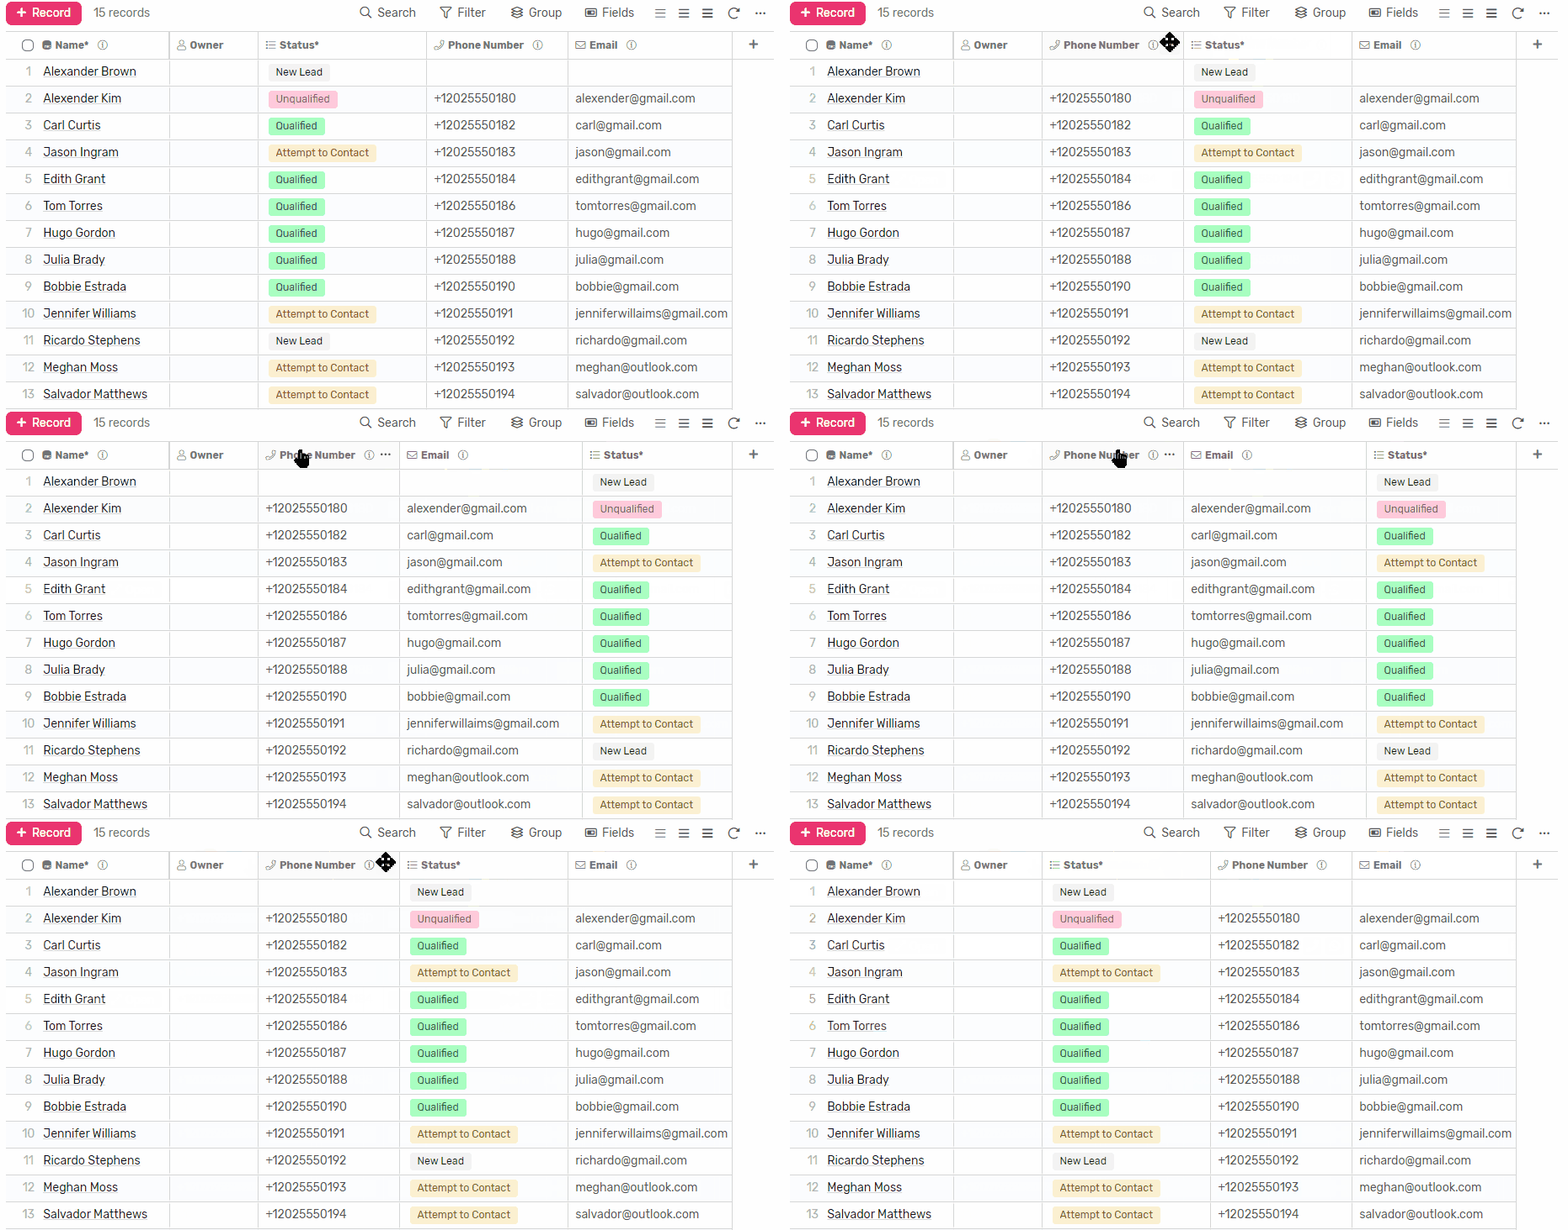
- Click and hold on the column in the table
- Drag it up and drop
- Now it’s hidden
Order Fields
Method 1
- Click on the Fields drop down menu
- Before each field you will see a drag indicator.
- Click and hold it then move the field to the order you’d like to see it at.
- Repeat for all fields until you’re satisfied with their order.
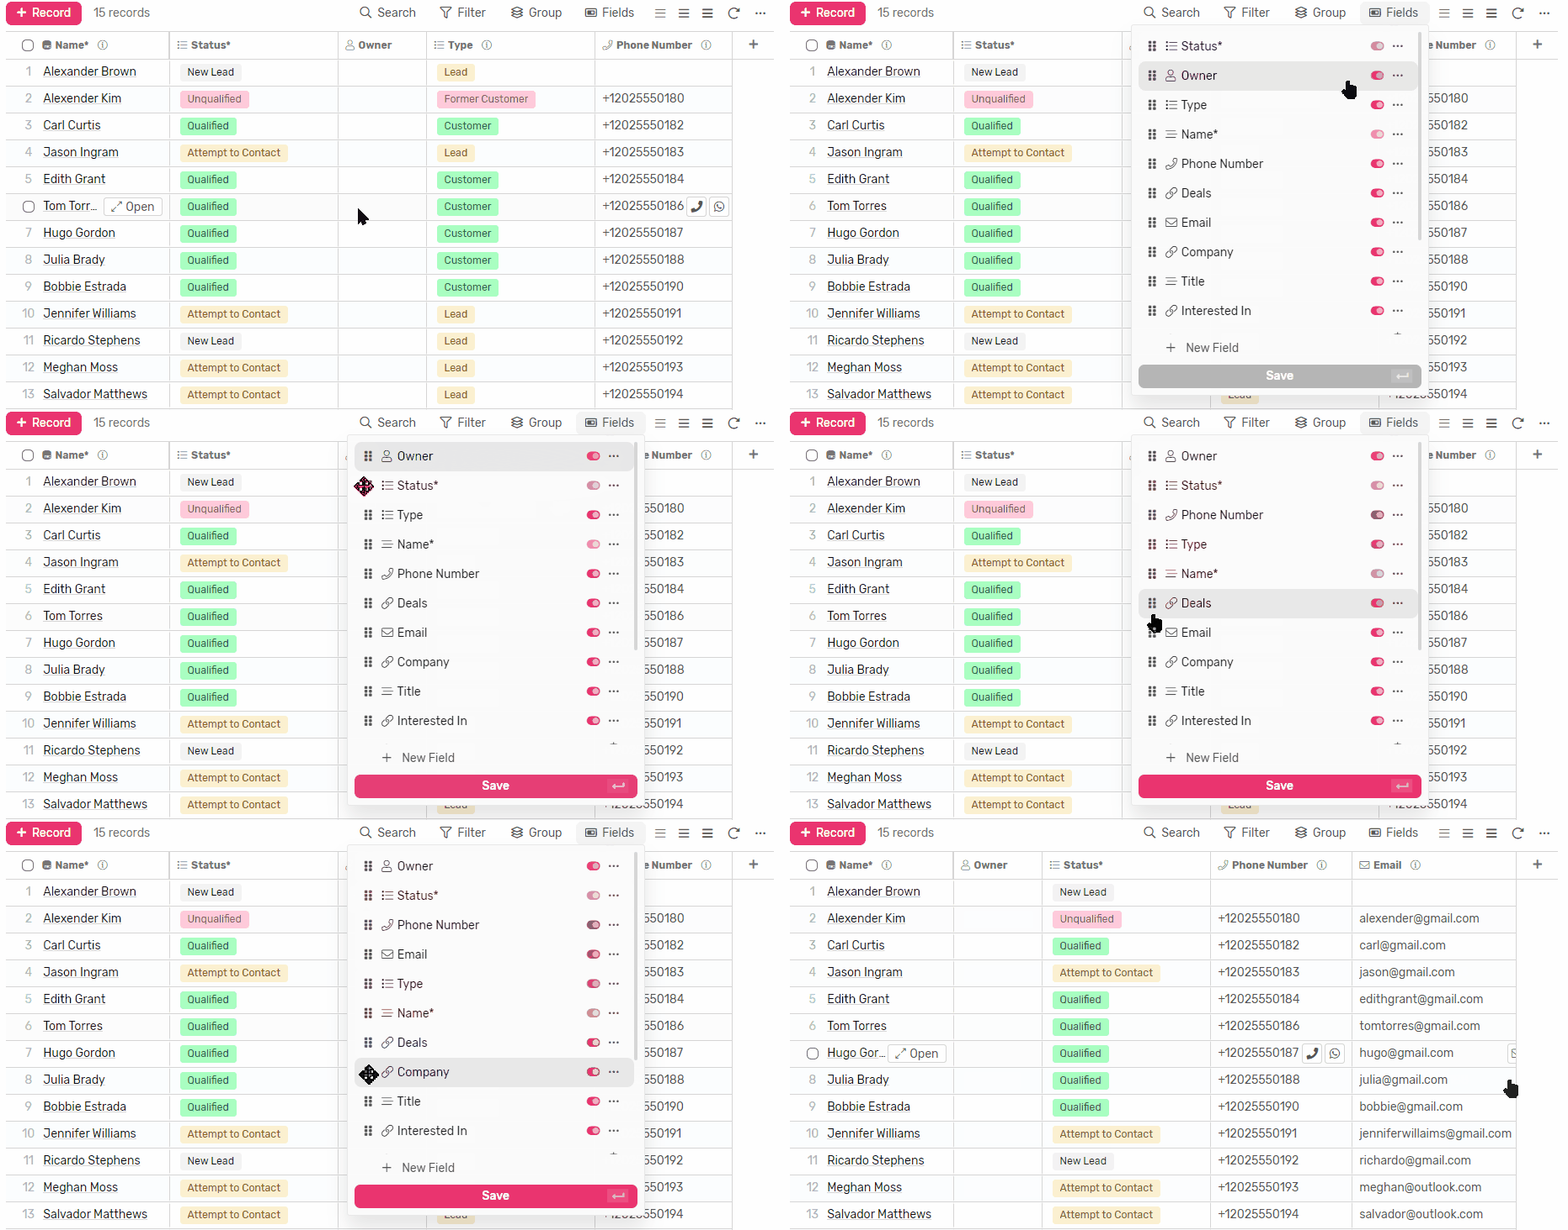
Method 2
- Click and hold any column
- Drag it horizontally between columns
- Drop it where you’d like to see it
- Repeat for all columns until you’re happy with the view
Grouping
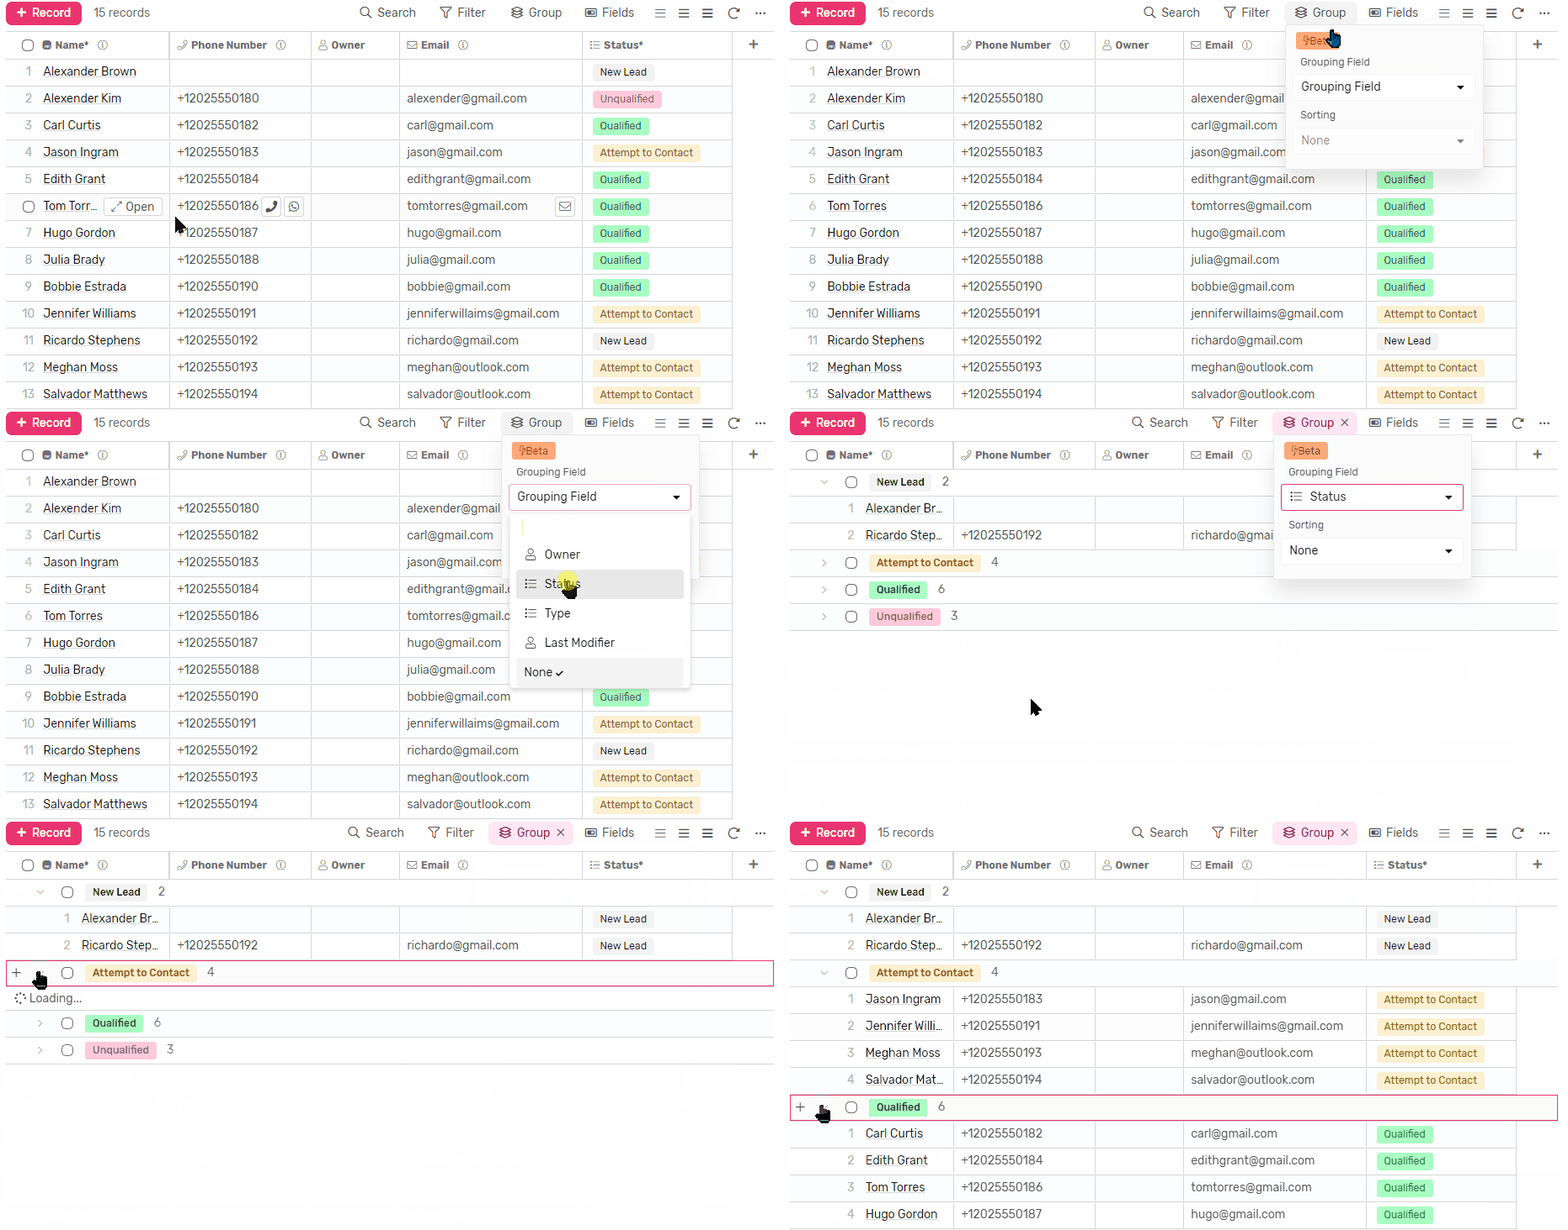
You can groups records (rows) based on a User, static list, status or a linked list * field for a cleaner view
- Click on grouping
- Select the grouping field from the available grouping fields in that list
- Select how you’d like the groups to be sorted
- Each group can be folded or opened separately
Note: Linked list can be grouped by only when they allow a single value (i.e. allow multiple is disabled).
Create a record in group
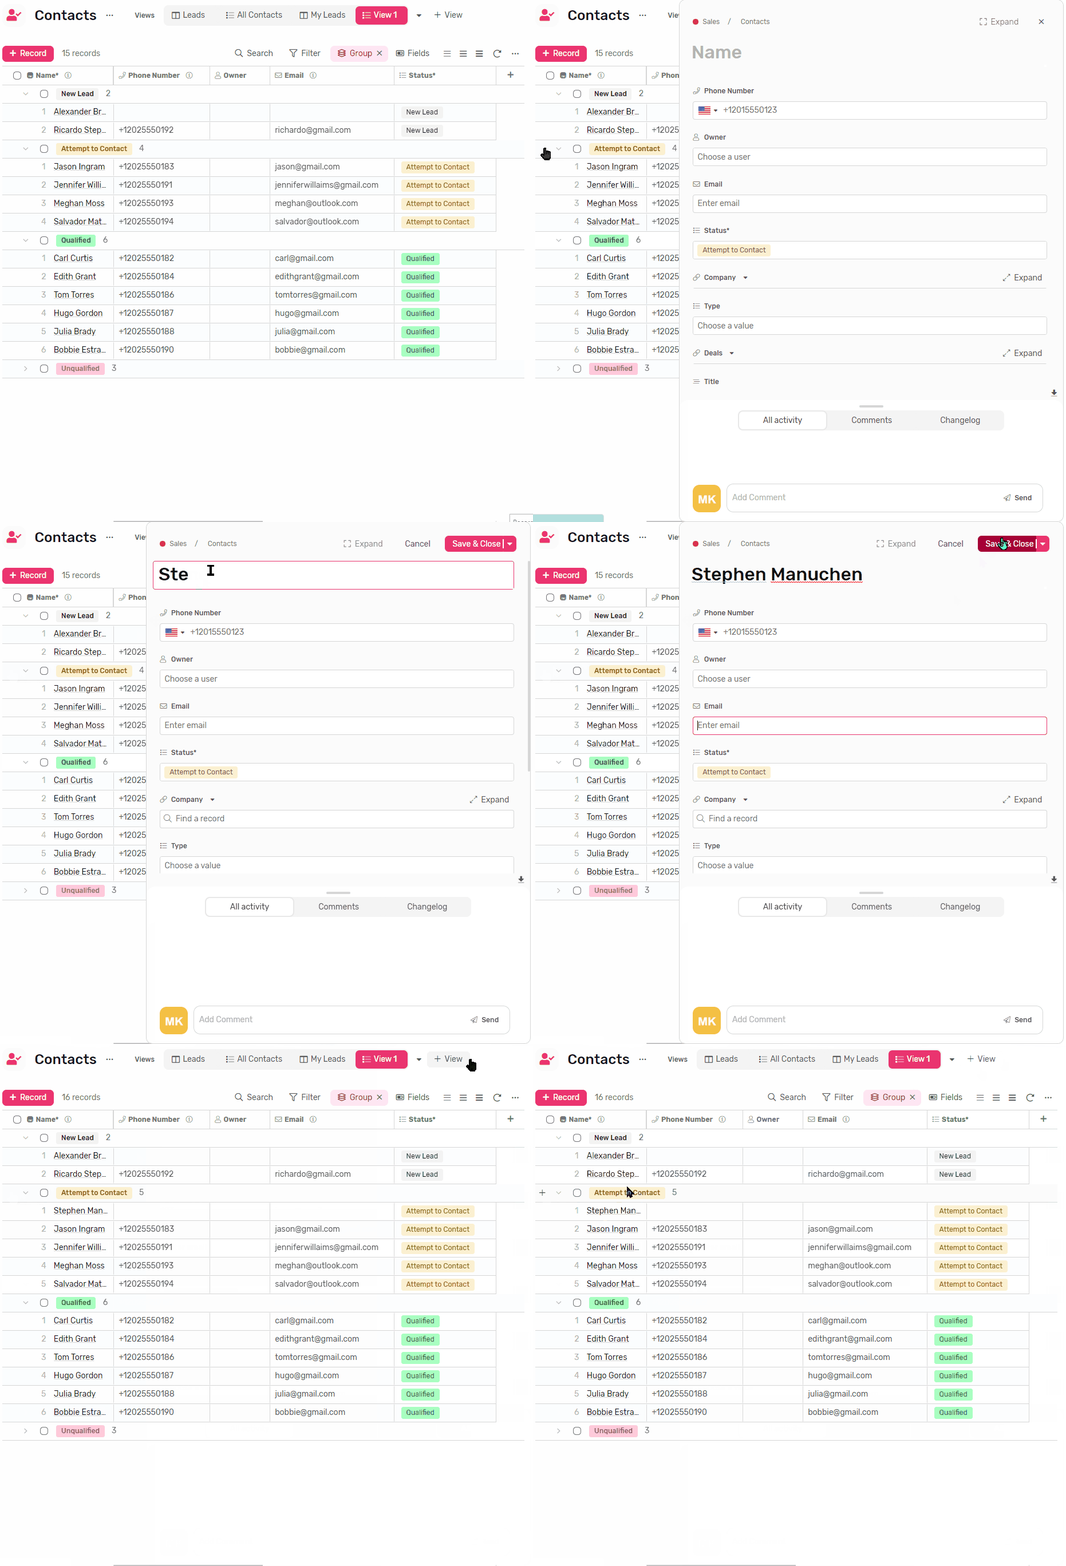
- Next to the group label you see a + sign
- Click it to create a record
- When the record is created it will have the field that determines the grouping automatically filled and will display under that group.
Bulk Update
Bulk update is convenient when you want to change a value of a field for multiple records at the same time with having to do the repetitive work yourself, here’s how you can do it:
Selecting Multiple Records
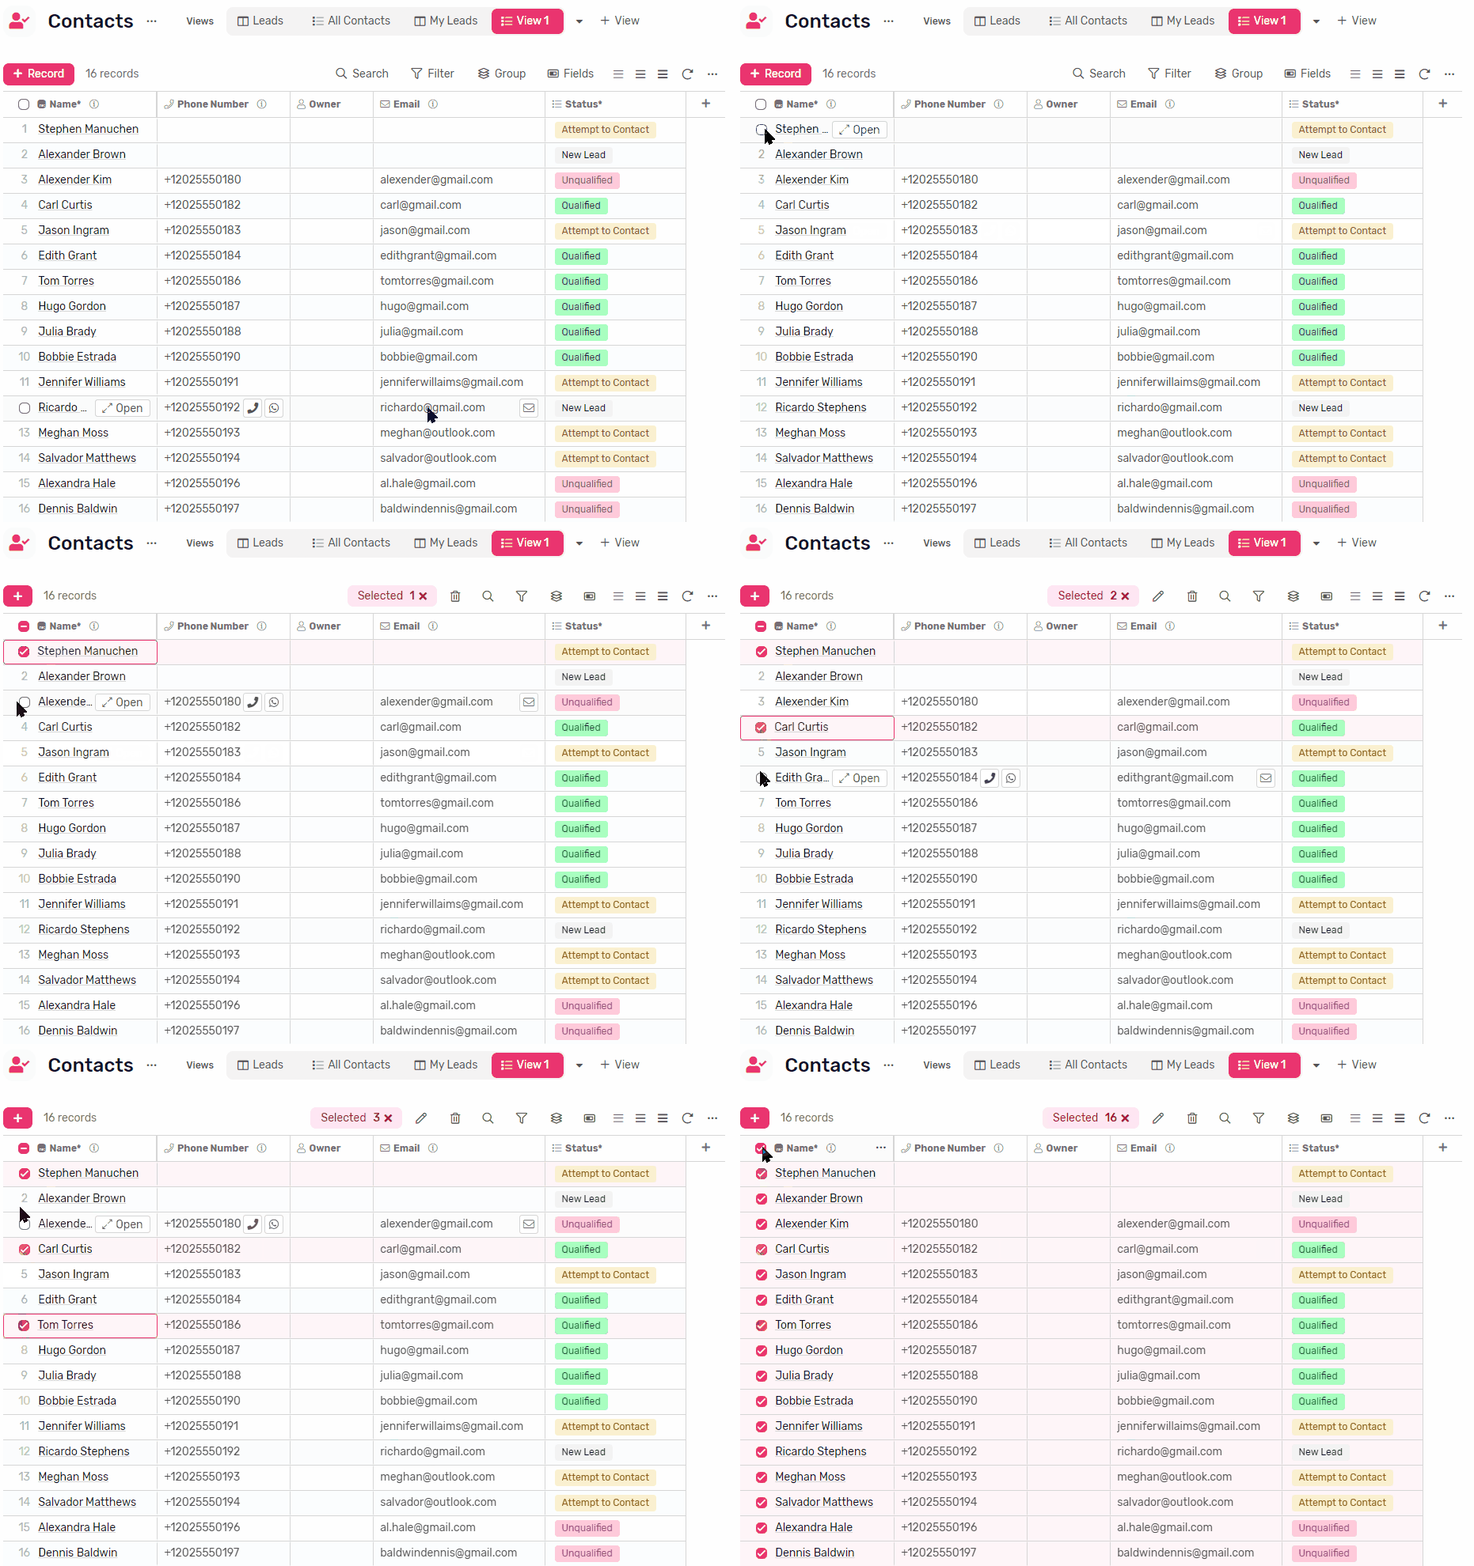
- You can select all visible records in the current view by clicking on the checkbox at the top left corner of the table.
- You can select all records in the group by clicking the checkbox next to the group title.
- You can manually select records by clicking the checkbox next to each record one by one.
Updating Selected Records
- Once you selected the records you’d like to update the Bulk Edit button will appear
- Click on the button and you can select the fields you’d like to update
- Find the first field you’d like to update, and assign a value to it.
- Click on + New Field to add as many fields as you need.
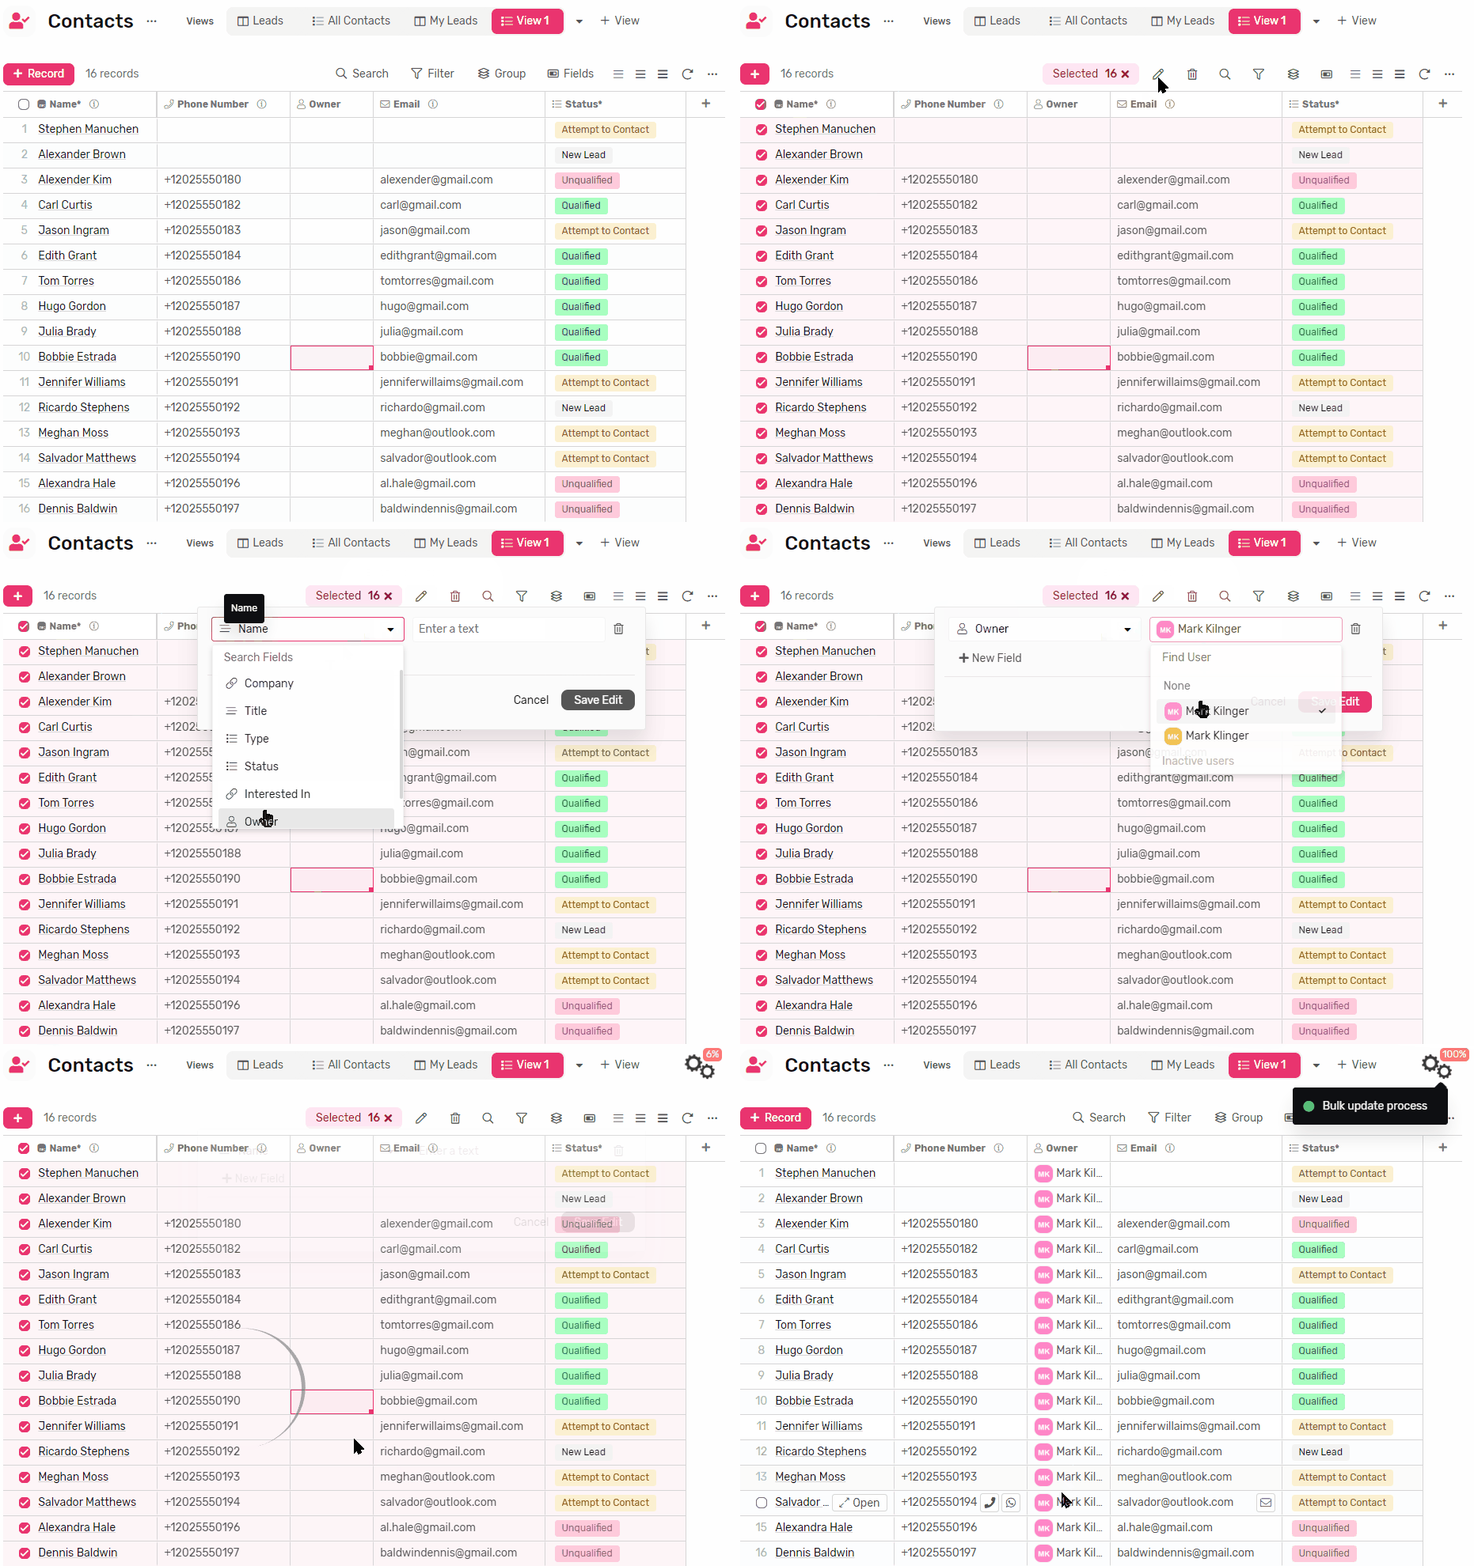
Bulk updating linked list
- If you try to update a linked list field with Allow Multiple enabled you will notice that there is a check box next to it labeled Append.
- If you keep it checked, the record you select for the bulk updated will be added to whatever is already linked.
- If you uncheck it the new value will replace whatever is in the field.
Quick Fill
You can quickly fill cells using one of the following methods
Fill Handle
- Highlight a couple of cells in the same column with your mouse by clicking and then moving your mouse up or down.
- You will notice a handle at the bottom right corner of the cell at the bottom of the selection, this is your fill handle.
- Click and Hold the grip handle, then drag it down to quickly fill cells.
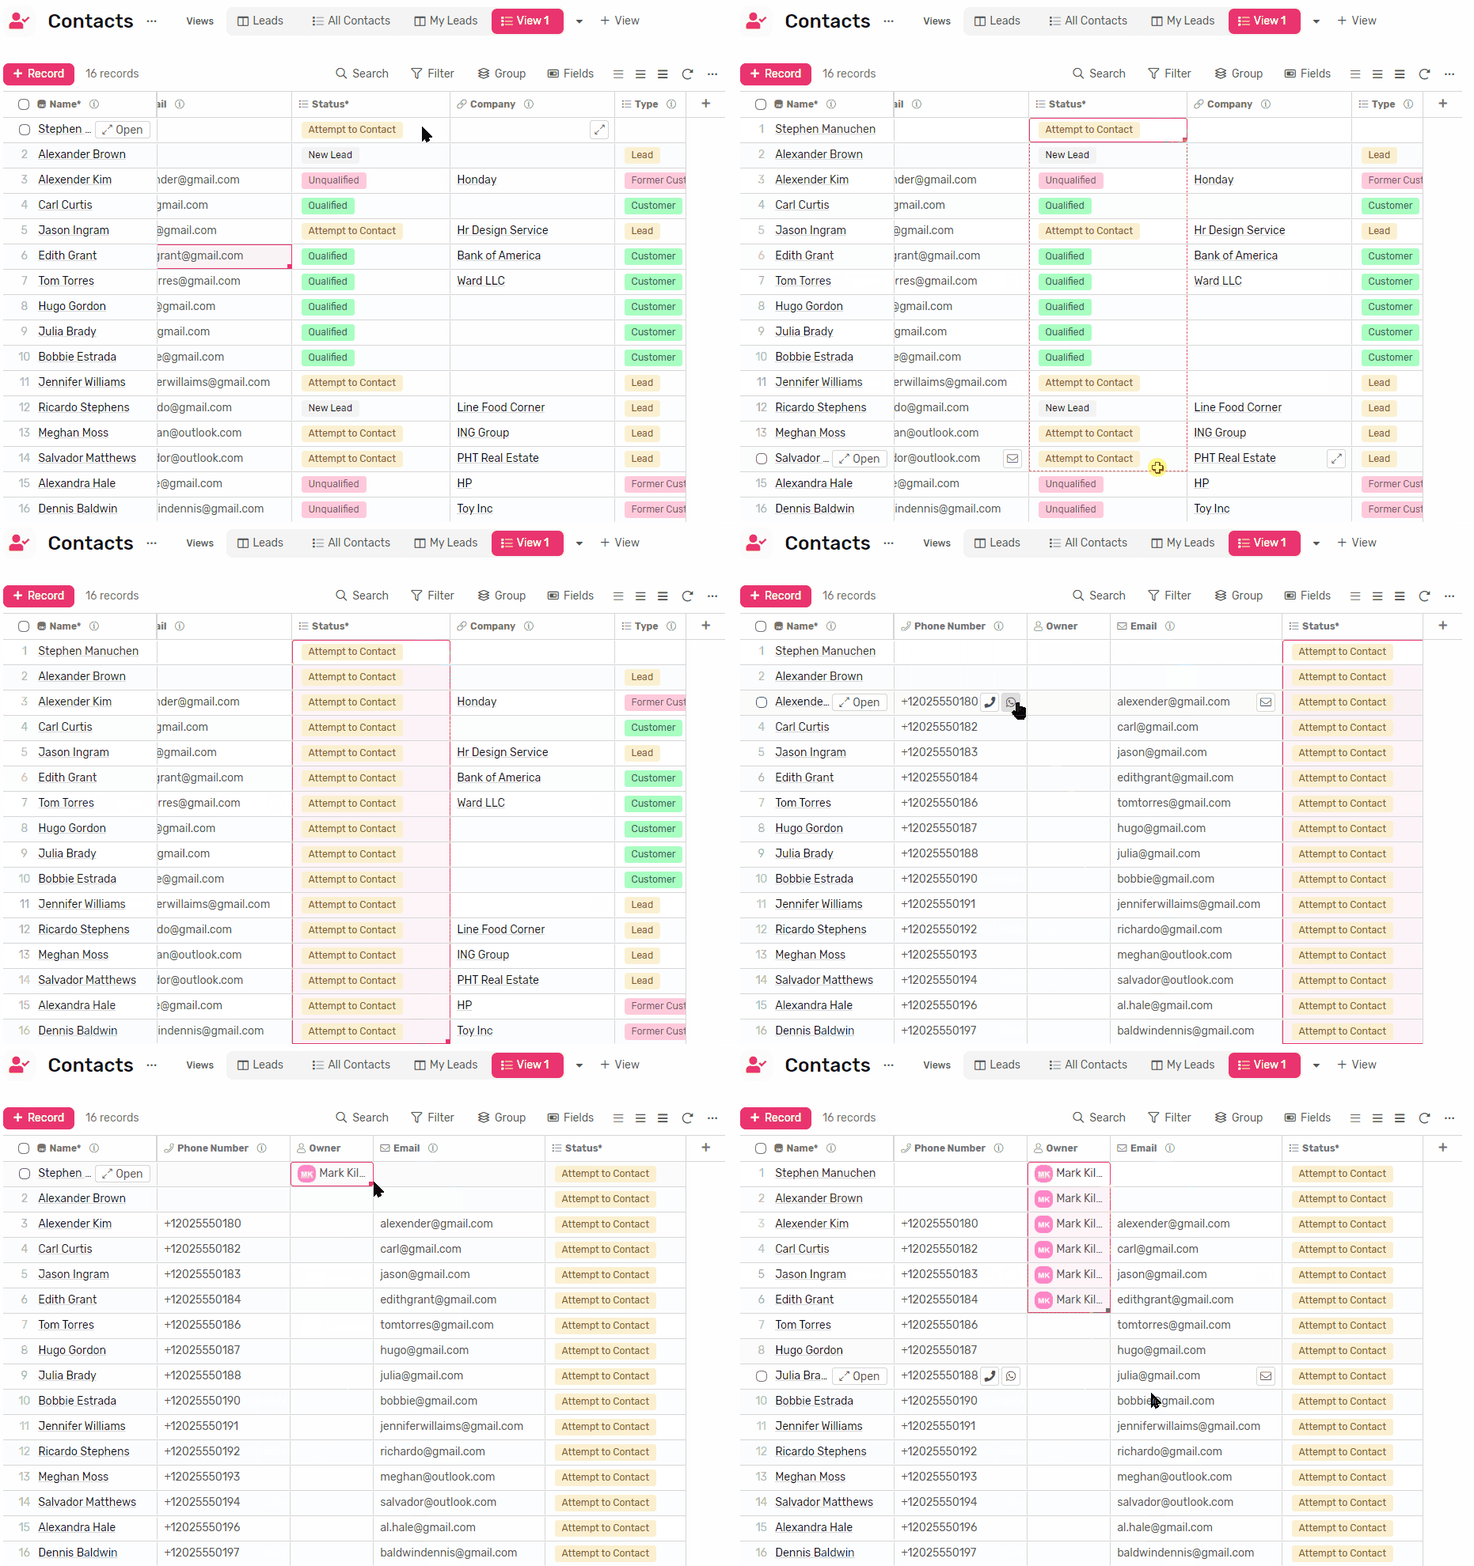
Copy & Paste
- Copy the value from one cell
- Highlight the cells you’d like to update
- Paste, and done!
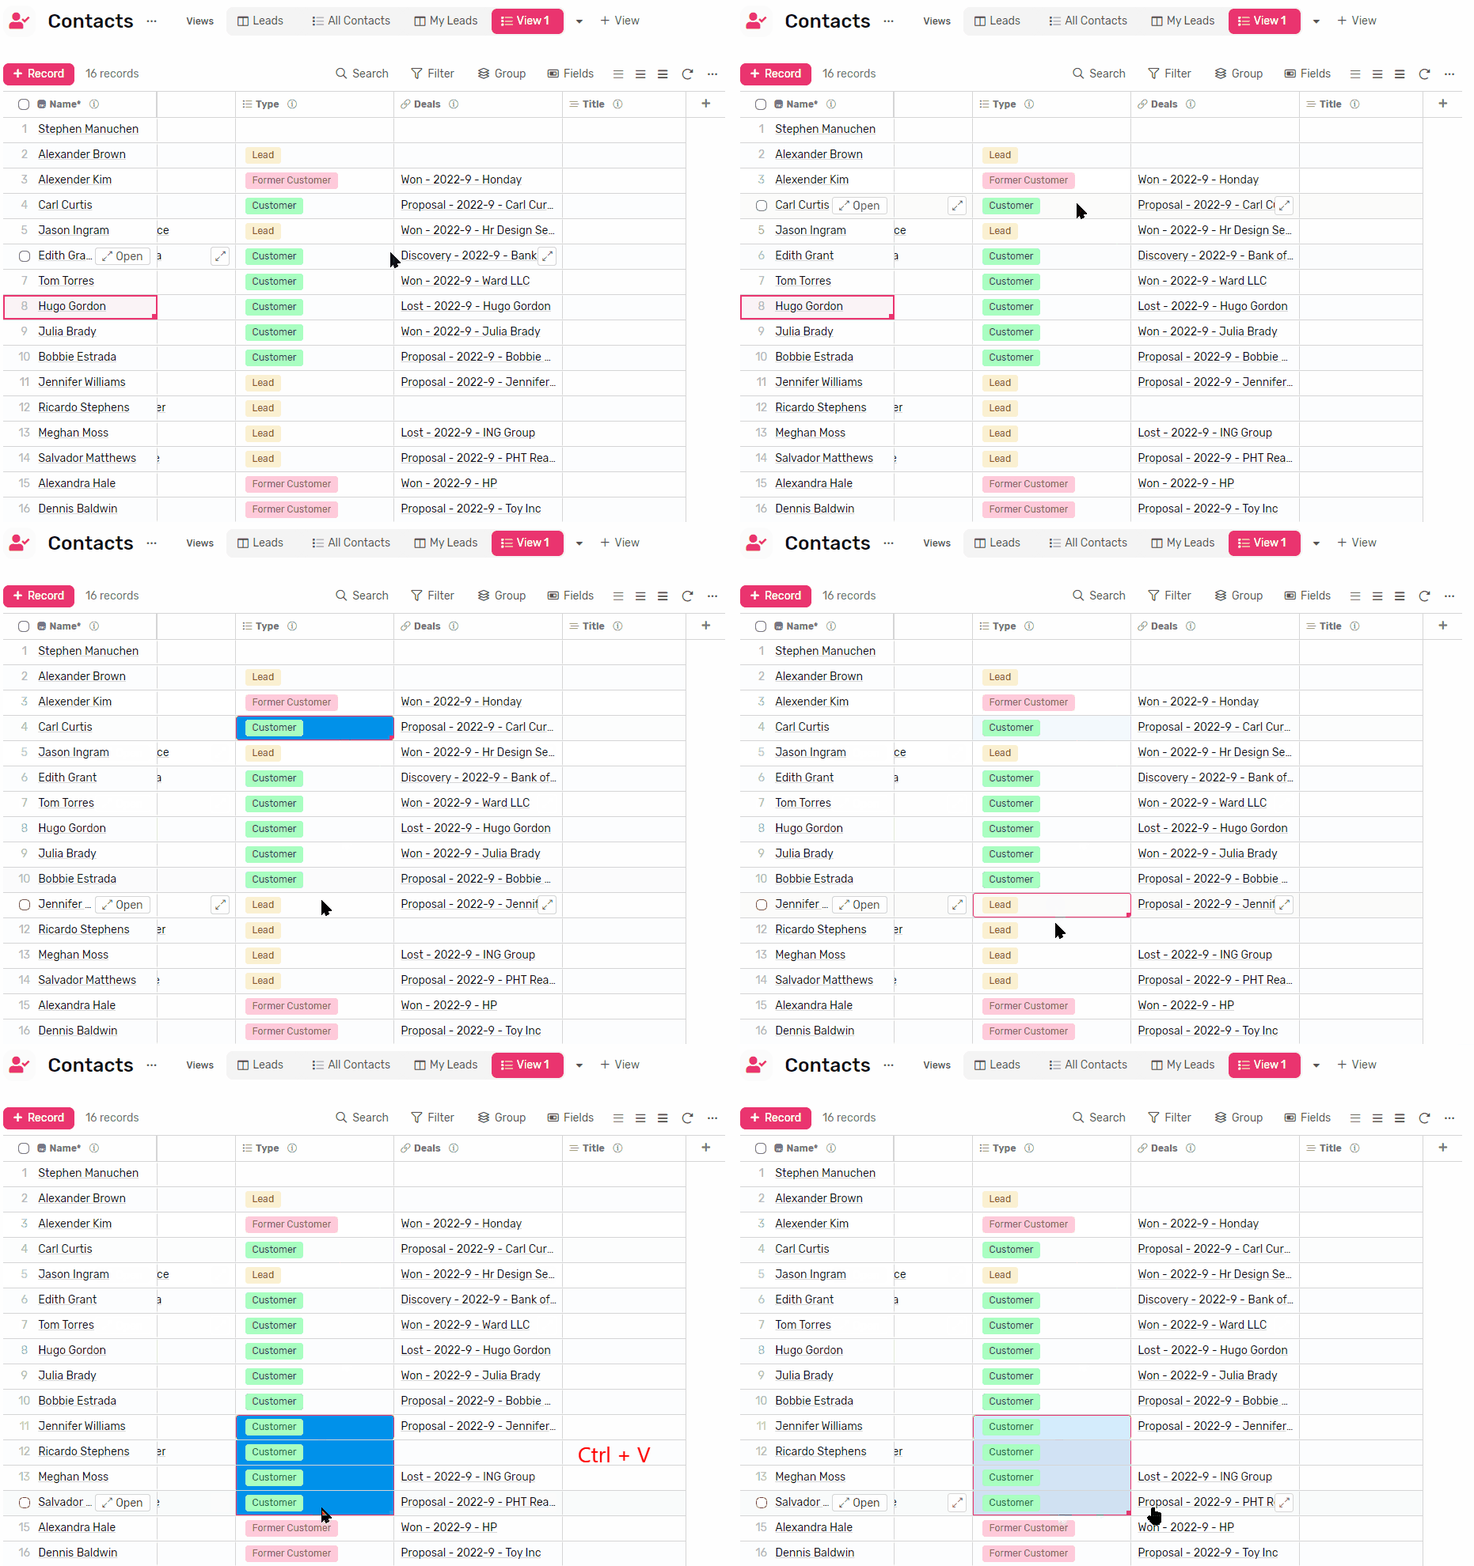
Quick Access
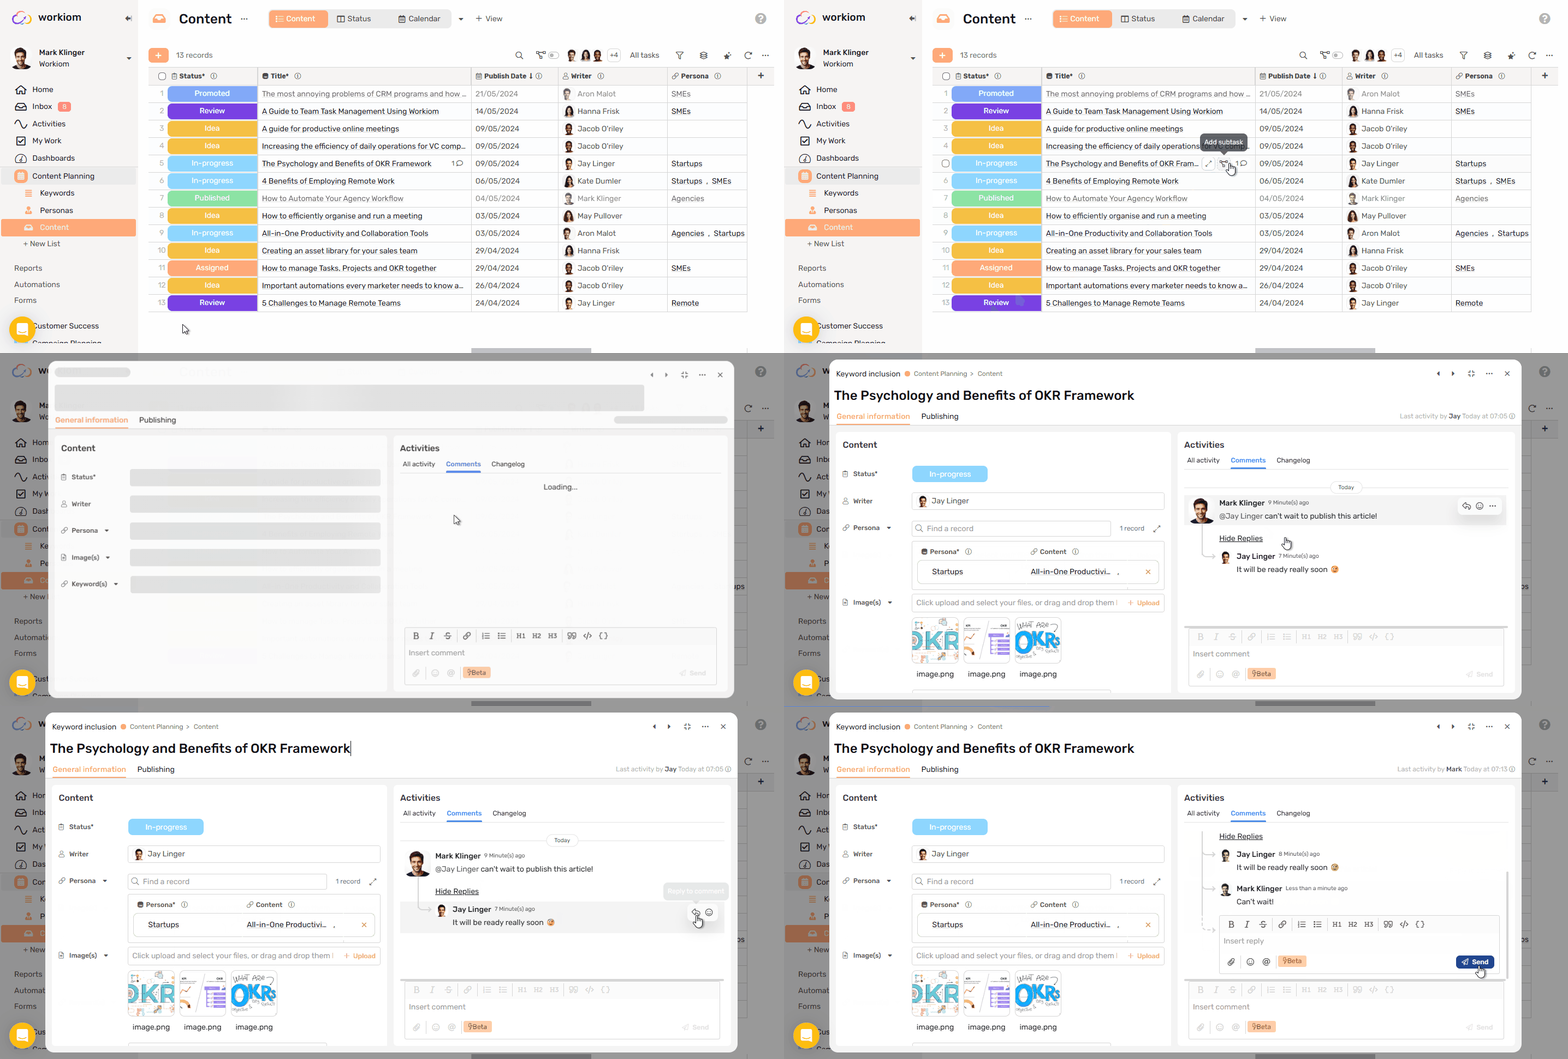
Subtasks
- In task list type records have a button to quickly access subtasks.
- To add your first subtask, simply hover on the record and click the subtask icons.
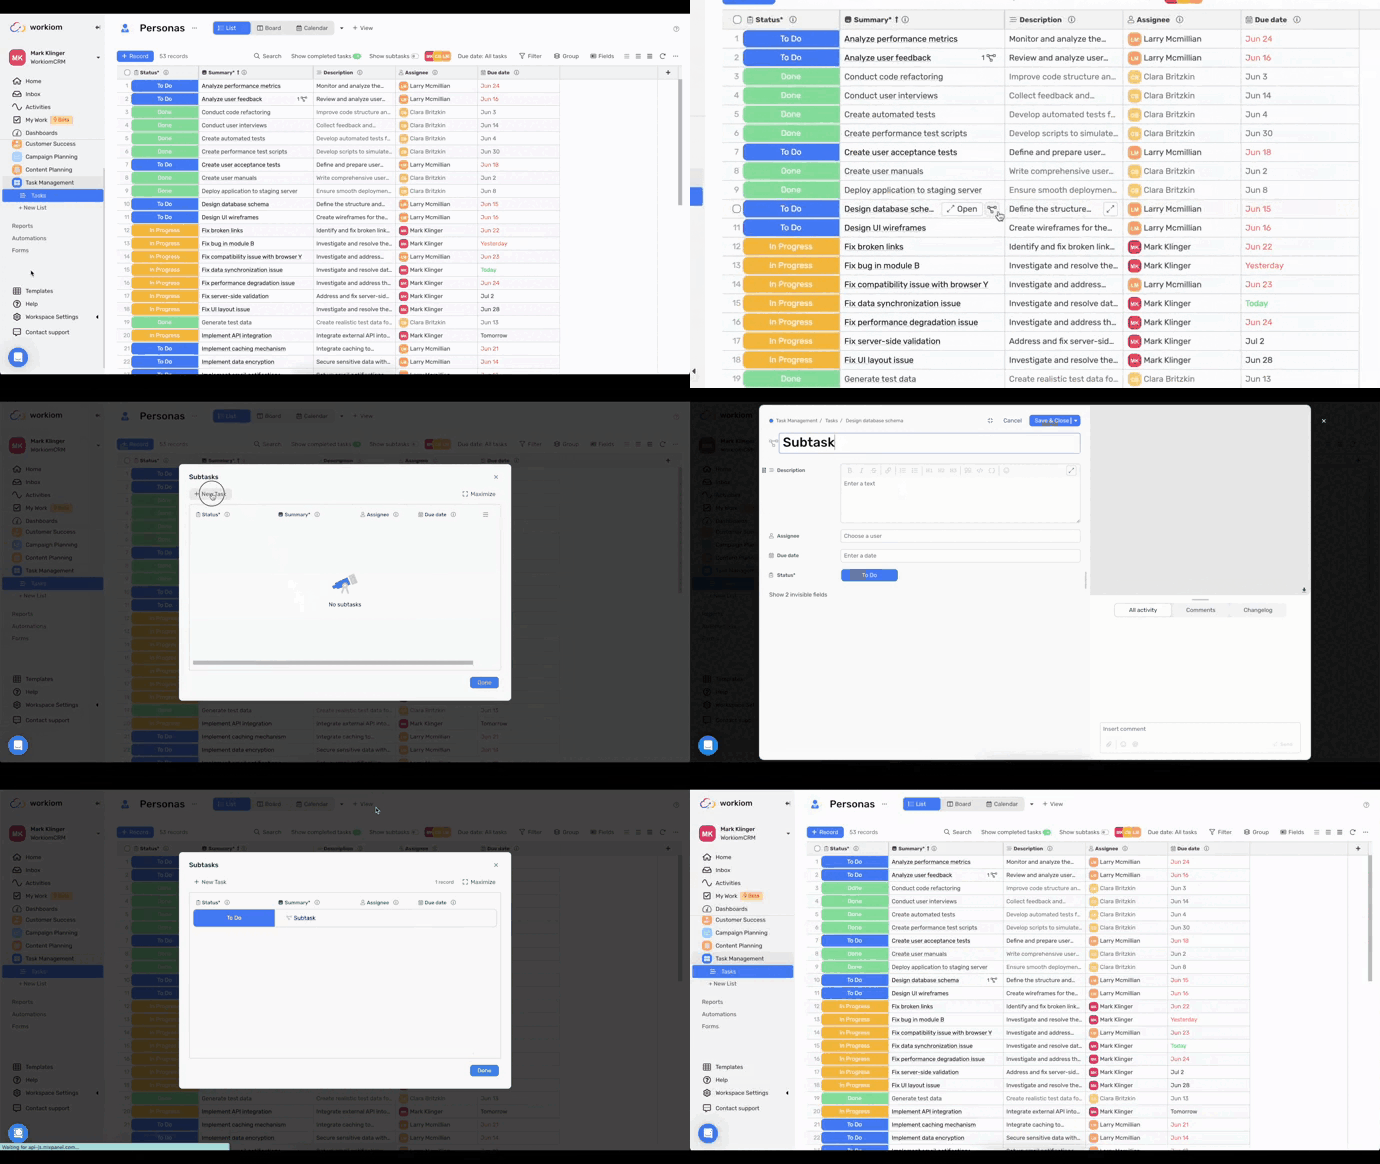
Comments
- If your record or task has comments you will see an indicatior with the number of comments
- Simply click on it and you will be directly taken to the comment section under your record or task.
