


Interface Permissions
Share Interfaces with users and teams using No access, Read only, and Owner levels.


Interfaces let you build custom experiences on top of your Workiom data. Interface Permissions let you decide who can create Interfaces, and share each Interface with specific users and teams.
Note: Interfaces are currently marked Beta, so details may change.
Find Your Interfaces
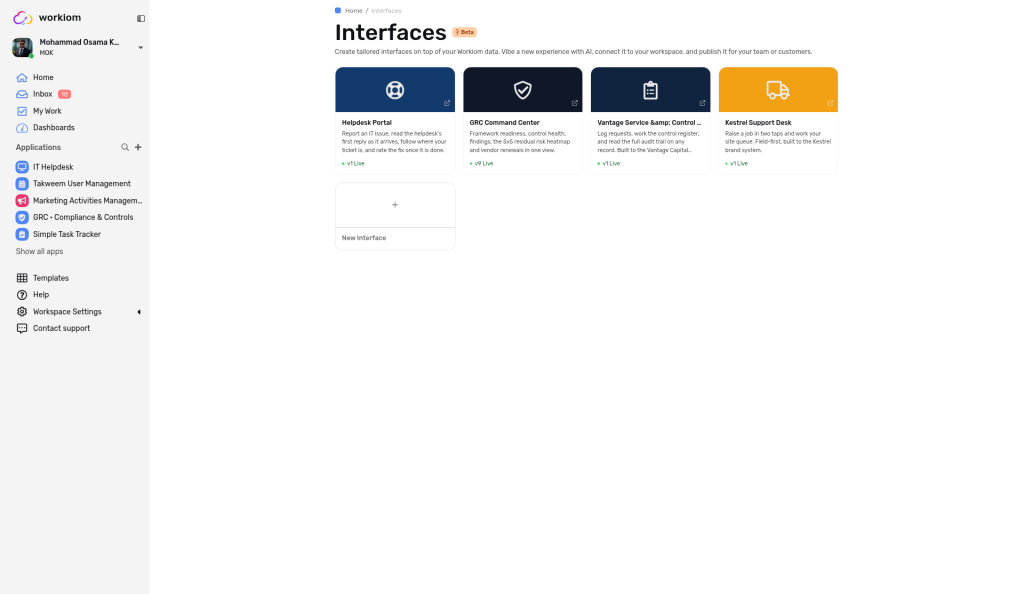
Open the Interfaces page (marked Beta). Each Interface appears as a card with its name, a short description, and its published version (for example, v1 Live). Select New Interface to create one.
Control Who Can Create Interfaces
Access to create Interfaces is set per team in Workspace Settings.
- Open Workspace Settings, then Teams & Permissions.
- Select a team and open its Permissions tab.
- Under General permissions, select or clear Create Interface, then select Save.
General permissions include:
- Create App
- Invite members
- Create dashboard
- Create Interface
- Use AI Mila

The Create Interface setting controls who can create Interfaces. The access you give on each Interface controls who can use that Interface.
Share an Interface
You share an Interface from its card, using Invite.
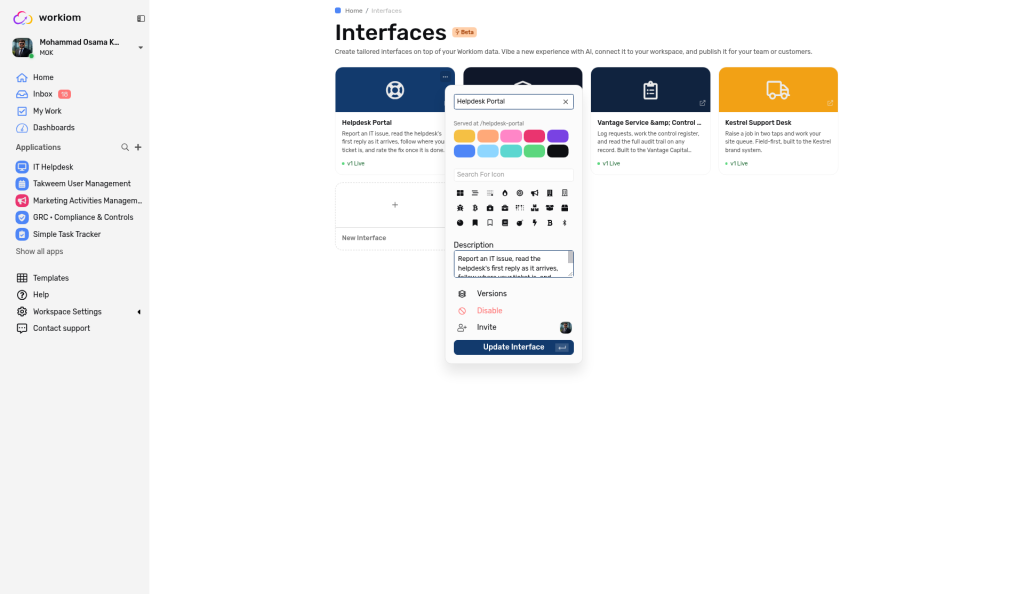
- On the Interfaces page, point to the Interface card and select the ⋯ icon.
- In the card menu, select Invite.
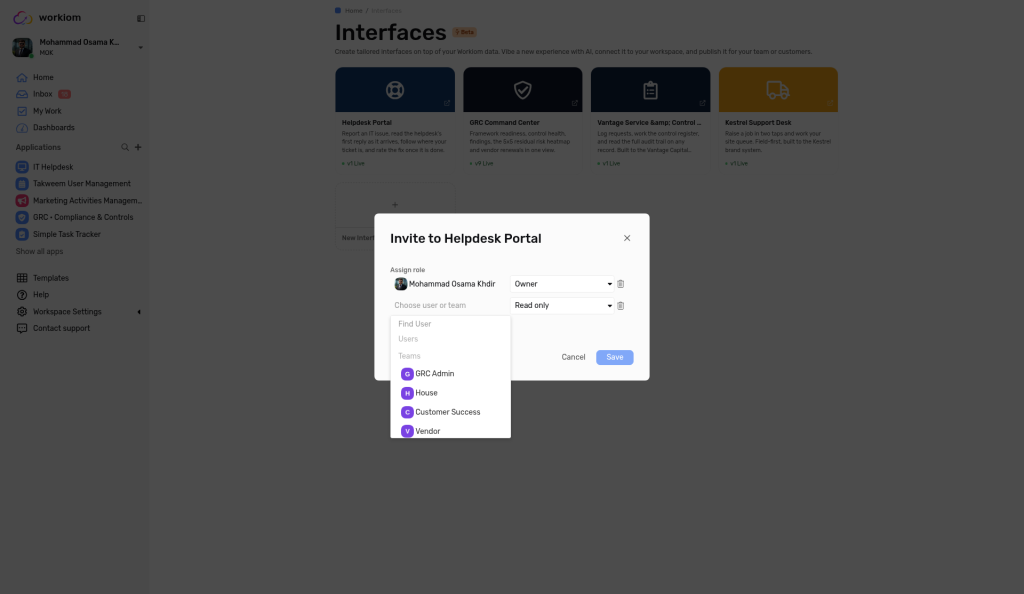
- In the Invite to dialog, look under Assign role. You start as the Owner of an Interface you created.
- Select + Add, then choose a user or team in the Choose user or team box. You can search with Find User, and the list is split into Users and Teams.
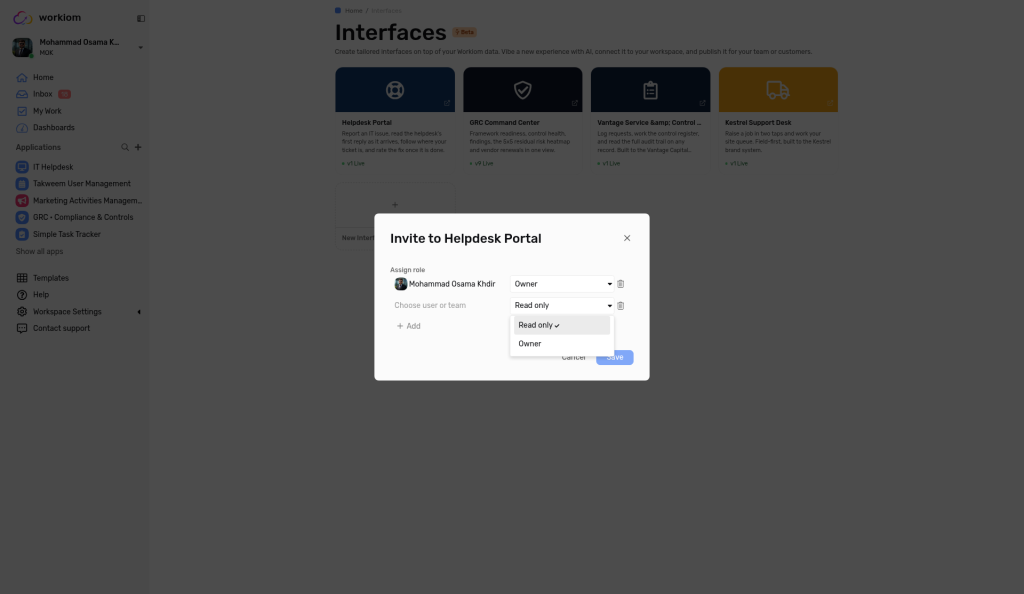
- Choose an access level for each row (see below).
- Select Save.
Expected result: The users and teams you added can open the Interface at the access level you chose.
Access Levels
Each person or team has one of two access levels on an Interface:
- Read only: the person can use the Interface without changing it. This is the default for a new row.
- Owner: the person has full control of the Interface.
To remove someone, select the trash icon on their row, then Save. The rows in the dialog are the list of who has access.
Use Case
- Business use case: An IT team builds a helpdesk Interface and invites a support team with Read only access. Two team leads are added as Owner.
- Simple use case: A project coordinator builds a team-updates Interface and invites a team such as Marketing as Read only, while keeping Owner access for themselves.
💡 Tip: Start with Read only and make someone an Owner only when they need full control.
Need help? Reach out to our support team and tell us which Interface you're working with and what you expected to happen, so we can help you faster.