Recommended Practices
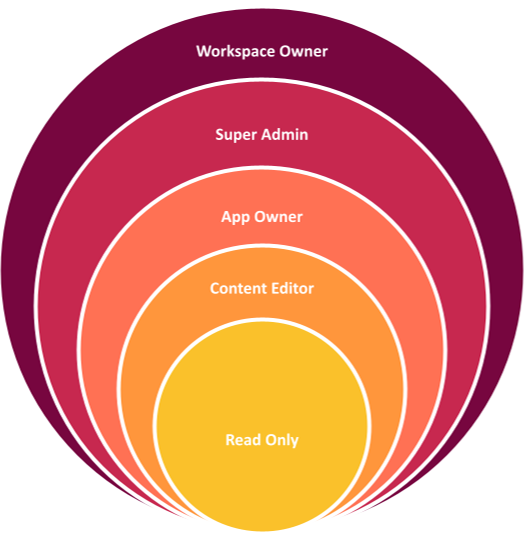
In order to ensure that we get the desired result from permissions it’s important that we understand the hierarchy of the levels of access, what happens when there’s a conflict in permissions, and what are some of the best practices when it comes to setting up permissions for your workspace.
Permissions Conflict
What if I limit a user’s access to an app under teams, and I invite as an owner to the App?
If you grant conflicting permissions to the same user under different areas the user will receive the highest level of access out of those configurations.
XLet’s take a few examples to make this clearer, in the example we have a user, and an app that the user has access to

Recommended Practices
Use Teams to set permissions
Under Teams & Permissions create teams to group your users under, we recommend doing it in this order:
- Create a team for each department and add everyone in the department to the team (e.g. Sales, Marketing, Development, HR)
- Give each team a read-only access to the apps they will be working on to ensure that they can at least reach the data in those apps.
- Create a team for each function in the department (e.g. Sales Representative, Sales Engineer, Team Leaders, Testers, Project Managers, Recruiters)
- Give each team the access they actually need to get their work done under those teams.
- Each time you invite a new user make sure you assign them to the team they need to be in.
Keep admins count to a minimum
When everyone has admin access the user will be overwhelmed with all the unnecessary access to the data and configuration they don’t need to see in their day to day work, and the user might accidentally change important configuration that would cause a disturbance in the workflow, or might even accidentally delete an important set of data.
That’s why it’s crucial to only give admin access to users who are tasked with administering the entire workspace.
Set your Apps to Private
Almost all users will need only limited access to part of the apps, that’s why it’s always a good idea to have your apps private while creating them, and then grant access to them as you see fit.
Avoid using App Invite
The option to invite users to an app directly is put in place to help you better account for special cases if you absolutely need to, but we advise to use it only to assign an owner to the app.
